

The Ultimate Guide to Deck Power Washing and Staining
The Ultimate Guide to Deck Power Washing and Staining
Deck Power Washing and Staining: Stop $15,000 Deck Rot Before It Starts
Deck power washing and staining is the single most effective way to protect your outdoor wood from the UV rays, moisture, and freeze-thaw cycles that silently destroy it every season.
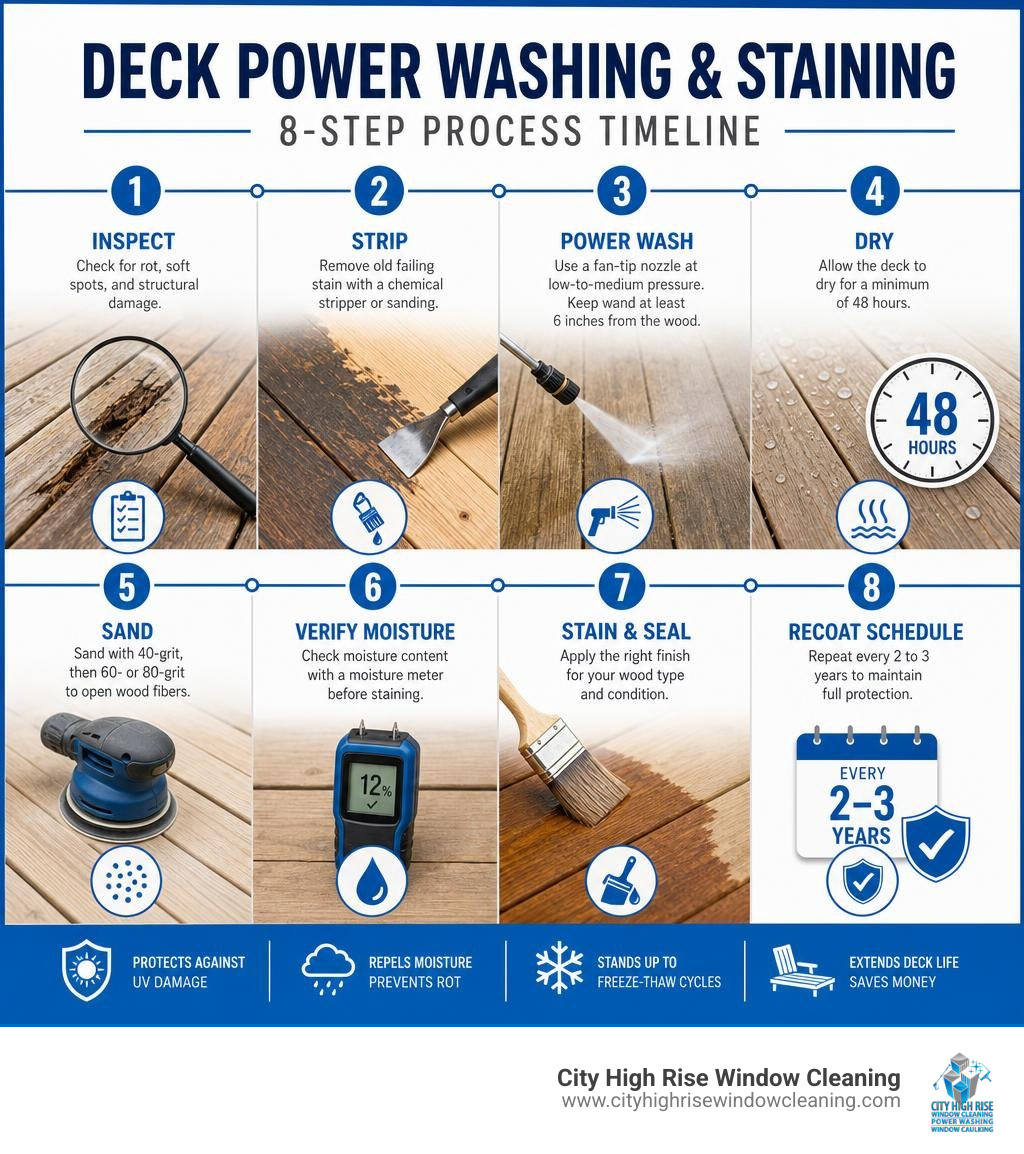
Here’s the process at a glance:
- Inspect the deck for rot, soft spots, and structural damage
- Strip old failing stain with a chemical stripper or sanding – not pressure alone
- Power wash using a fan-tip nozzle at low-to-medium pressure, keeping the wand at least 6 inches from the wood
- Dry for a minimum of 48 hours before applying any finish
- Sand with 40-grit, then 60- or 80-grit to open wood fibers
- Verify moisture with a moisture meter before staining
- Stain and seal using the right finish for your wood type and condition
- Repeat every 2 to 3 years to maintain full protection
Most homeowners don’t realize how fast untreated wood deteriorates. UV rays fade and dry the surface. Rain forces moisture deep into the grain. Then winter arrives – and trapped moisture expands as it freezes, splitting and warping boards from the inside out. What looks like a cosmetic problem is often the beginning of structural failure.
The good news? Most weathered decks don’t need to be replaced. A proper cleaning and staining can restore wood that looks completely ruined – at a fraction of the cost of a new deck.
Deck replacement for a mid-size deck can run $15,000 to $50,000 or more. A full professional restoration with heavy prep typically costs $800 to $2,500. The math isn’t close.
And here’s the stat that changes how you think about the whole process: 80% of deck stain longevity comes from preparation – not the stain itself.
I’m Brett Hochman, CEO of City High Rise Window Cleaning, with over 48 years of hands-on exterior restoration experience across New York City, Long Island, New Jersey, and Westchester. My team applies the same disciplined prep-first approach to deck power washing and staining that we use on commercial high-rise facades – because whether it’s a skyscraper or a backyard deck, the fundamentals of surface protection don’t change.
Deck power washing and staining word list:
Restore vs. Replace: Knowing When Your Deck is Salvable
Before you fire up a pressure washer or buy gallons of premium stain, we need to answer a fundamental question: Is this deck actually salvable, or are you just putting lipstick on a rotting structural hazard?
In my decades of restoring exteriors across Long Island and Westchester, I’ve seen many homeowners assume their gray, moldy deck was a goner. In reality, wood has an incredible capacity for revival. However, we must separate surface-level weathering from deep structural decay.
Signs Your Deck Needs Restoration
If your deck exhibits the following signs, it is an excellent candidate for a professional restoration rather than a costly tear-down:
- Fading and Graying Color: This is simply UV degradation of the surface wood cells. A good cleaning and brightening will bring back the natural wood tones.
- Peeling, Flaking, or Cracking Stain: This indicates the previous coating has reached the end of its lifespan and is failing to adhere, but the wood beneath is still healthy.
- Surface Mold, Mildew, and Algae: Green or black surface film looks terrible and makes the deck incredibly slippery when wet. However, this is organic growth feeding on surface dirt, not wood-destroying rot.
- Water Absorption: If you perform a simple water test — sprinkling water onto the wood boards — and it immediately soaks in rather than beading up, your sealant has failed. It’s time to clean and restain.
When Complete Replacement is Unavoidable
Cosmetics can be fixed; structural failure cannot. You must replace parts of your deck, or the entire structure, if you find:
- Structural Rot: Take a flathead screwdriver and press it into the posts, joists, and under-structure. If the screwdriver easily sinks into the wood, you have rot.
- Soft Spots on Planks: If multiple deck boards bend, sag, or feel spongy underfoot, the wood fibers have structurally broken down.
- Ledger Board Decay: The ledger board connects your deck to your house. If this board is rotting or pulling away, the deck is unsafe to use.
- Insect Damage: Extensive tunneling from carpenter ants or termites weakens the structural integrity beyond repair.
If your deck is between 5 and 20 years old and structurally sound, restoration is almost always the smarter, more economical choice.
The Technical Differences: Pressure Washing vs. Power Washing
Many people use these terms interchangeably, but in the professional restoration industry, they mean two very different things.
- Pressure Washing: Uses cold water pressurized by an electric or gas motor to blast away dirt and grime. It is highly effective for standard home maintenance.
- Power Washing: Uses highly pressurized heated water. True power washers contain a heating element (like a boiler) to blast hot water. This heated water is essential for melting away grease, heavy oil, deeply embedded mold spores, and stubborn old sealants.
For a residential wood deck, cold-water pressure washing is typically the standard, as excessive heat can actually soften wood fibers and make them more susceptible to gouging. However, for heavily neglected decks with stubborn grease stains or deep mold infestations, a professional-grade hot-water system operated by an expert is incredibly effective. To learn more about the exact mechanics, check out The Ultimate Guide to the Best Way to Power Wash a Deck.
Choosing the Right Pressure and Spray Tips
Using the wrong pressure or nozzle tip is the number one way DIYers ruin their decks. High pressure can shred wood fibers, leaving permanent scars that no stain can hide.
| Nozzle Color | Spray Angle | Best Use on Decks | Risk Level |
|---|---|---|---|
| Red (0°) | Pencil Jet | NEVER USE | Extremely High (Will gouge wood instantly) |
| Yellow (15°) | Narrow Fan | Hardwood stripping (Professional use only) | High (Can easily scar softwoods) |
| Green (25°) | Medium Fan | Standard washing and rinsing | Moderate (Safe if kept 12″ away) |
| White (40°) | Wide Fan | Softwood washing and chemical rinsing | Low (Safest choice for DIYers) |
| Black (65°) | Soap Tip | Applying detergents and brighteners | Extremely Low (Low pressure) |
When washing wood, you must match your PSI (pounds per square inch) to the type of wood:
- Softwoods (Pine, Cedar, Redwood): Keep pressure between 500 and 800 PSI.
- Hardwoods (Ipe, Mahogany, Tigerwood): Keep pressure between 1,200 and 1,500 PSI.
Always maintain a 30-degree angle to the boards, hold the wand at least 6 inches away from the surface, and use a sweeping, side-to-side motion along the grain of the wood.
Can You Pressure Wash Composite Decking?
The short answer is: Proceed with extreme caution.
Composite decking (like Trex) is made of a blend of wood fibers and plastic. It is softer than natural wood, meaning high pressure can easily scratch or gouge the surface, leaving permanent marks. Furthermore, using high pressure on composite materials can void the manufacturer’s warranty.
If you must wash composite decking, use a low-pressure soft wash method (under 300 PSI) combined with a dedicated composite deck cleaner and a soft-bristle brush.
The Complete Step-by-Step Process for Deck Power Washing and Staining
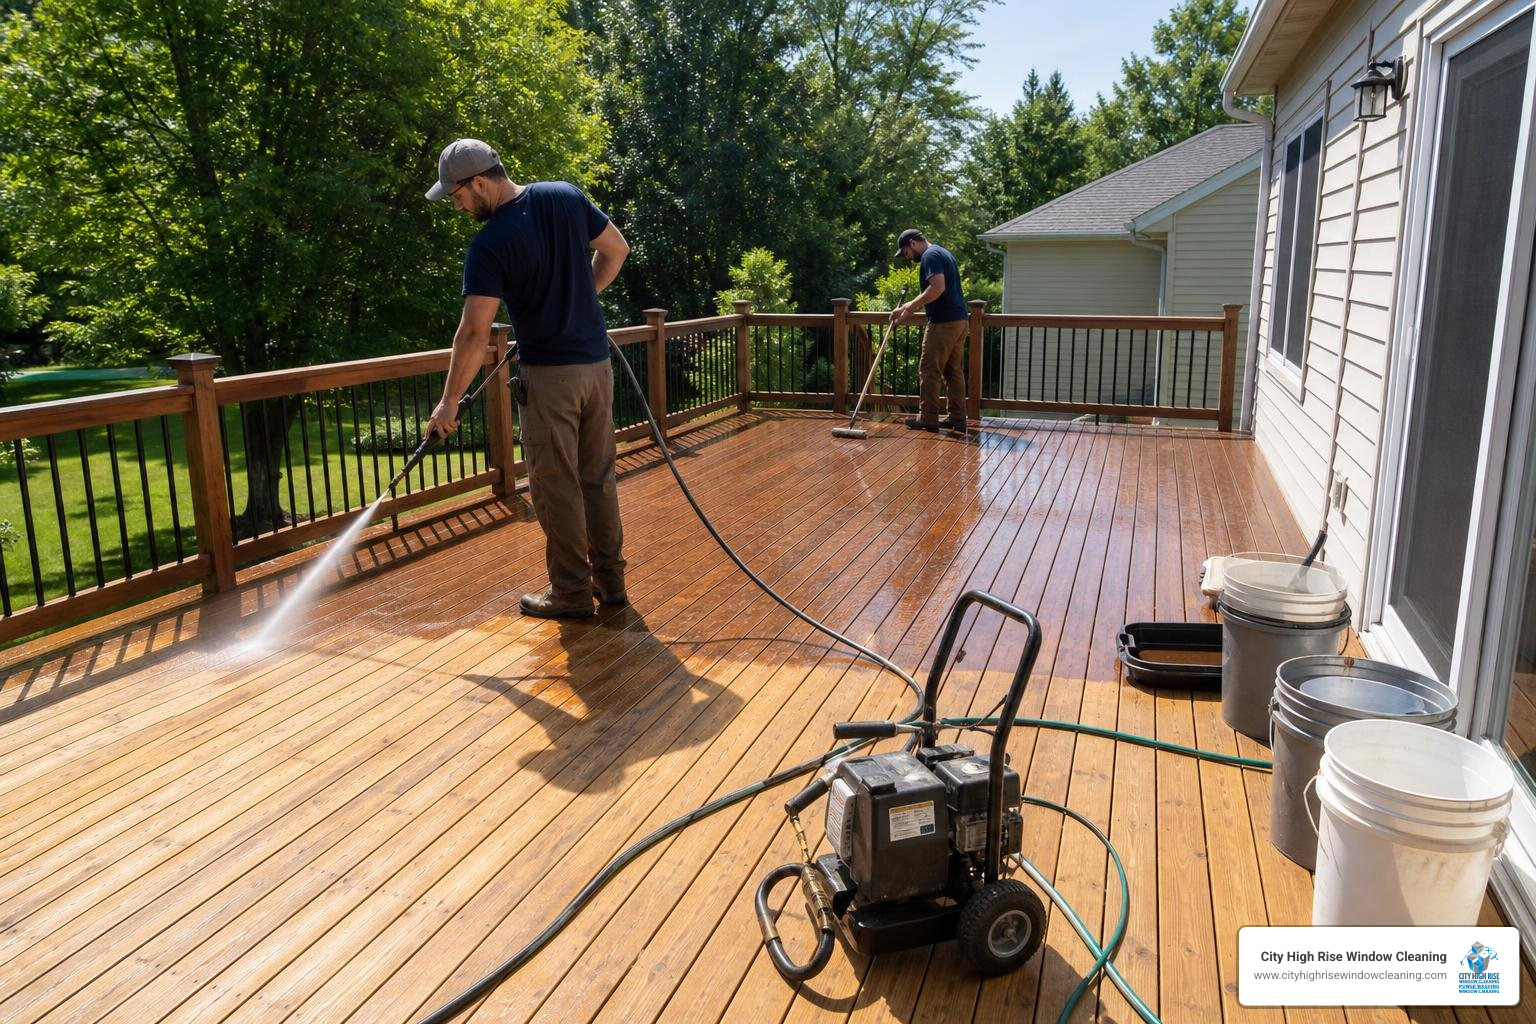
Now, let’s dive into the actual step-by-step execution. Before you pull the starter cord on your machine, protect yourself and your property.
Choosing the Right Tools for Deck Power Washing and Staining
To do this job right, you need the proper arsenal:
- Pressure Washer: A gas-powered unit (2,500 to 3,000 PSI) is preferred for its efficiency, but a high-quality electric unit can work if you take your time. Read more on how to choose in Amazon and Reddit Agree These Are the Best Power Washers.
- Chemicals: A high-quality wood stripper or a sodium-percarbonate wood cleaner, plus an oxalic-acid wood brightener.
- Personal Protective Equipment (PPE): Safety goggles, chemical-resistant gloves, a respirator (when spraying chemicals), and slip-resistant work boots.
- Brushes and Applicators: A stiff-bristle synthetic brush (no metal bristles, which can rust in the wood) and high-quality stain brushes or rollers.
Preparing and Stripping the Wood Surface
Preparation is where 80% of your success lies.
- Clear the Deck: Remove all furniture, grills, and planters.
- Protect Nearby Plants: Cover surrounding shrubs, flowers, and grass with plastic tarps. Wet them down thoroughly with water before and after chemical application to dilute any runoff.
- Apply Wood Stripper: If your deck has an old, peeling stain, apply a dedicated chemical wood stripper containing sodium hydroxide or sodium percarbonate. Apply it from bottom to top on vertical surfaces like railings to prevent streak marks. Let it dwell according to the manufacturer’s instructions (usually 15-20 minutes), keeping it wet by misting it with water.
Washing and Rinsing Safely
Once the stripper has softened the old finish, it’s time to wash:
- Test Your Spray: Start on an inconspicuous area of the deck to verify your pressure and distance.
- Sweep the Grain: Move the wand in long, continuous, sweeping motions along the length of each board. Never stop the wand or change directions mid-board, as this leaves visible marks.
- Scrub Corners: Use a hand-held stiff-bristle brush to clean tight corners, stairs, and balusters where the spray wand cannot safely reach.
- Rinse Thoroughly: Flush all chemical residues off the wood and out from the gaps between boards. For more on keeping your property clean during the process, see How to Pressure Wash a House Without Making a Mess.
Post-Wash Prep: Drying, Sanding, and Moisture Verification
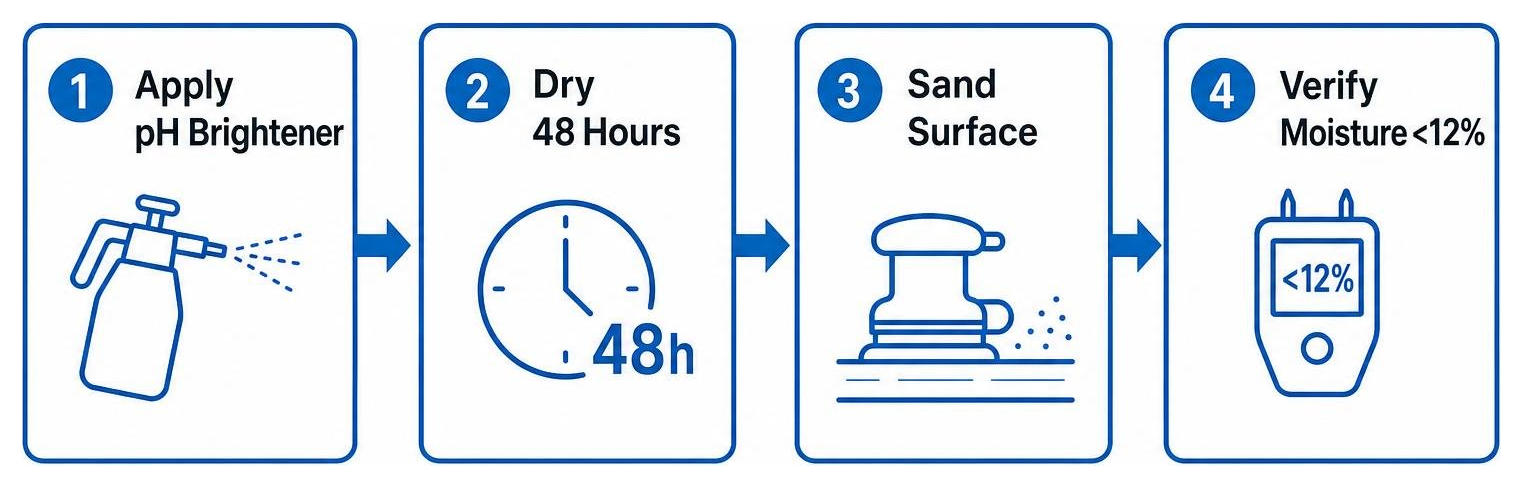
The wash is finished, but you cannot open a can of stain yet. Applying stain to wet or improperly prepped wood is the primary reason deck coatings peel within six months.
Why Sanding is the Secret to Longevity
After power washing, you will notice that the wood feels rough or “fuzzy.” This is because water pressure raises the wood grain.
Sanding is non-negotiable for two reasons:
- Smoothness: It removes the splintery wood fibers, making the deck comfortable for bare feet.
- Porosity: Sanding opens up the pores of the wood, allowing the stain to penetrate deeply rather than sitting on top of the surface.
Use an orbital sander or a specialized deck sander. Start with 40-grit sandpaper for rough areas, and finish with 60- or 80-grit sandpaper over the entire surface. Do not use sandpaper finer than 80-grit on deck floors, as it can polish the wood and close the pores, preventing stain absorption.
Testing Moisture Levels Before Coating
Before you apply a single drop of stain, the wood must be dry. How dry? 12% moisture content or lower.
In our humid northeastern climate — whether you are on the water in Long Island or up in Westchester — wood retains moisture far longer than it appears to on the surface. While the surface might look dry after 24 hours, the core of the wood could still be saturated.
- The Moisture Meter Test: The only foolproof method is to use a digital pin-type moisture meter. Press the pins into the wood in several spots. If it reads above 12%, wait another day.
- The Water Bead Test: If you don’t have a meter, sprinkle water on the wood. If it sinks in instantly, the wood is dry enough to absorb stain. If it beads or sits on top, the wood is either still wet or has a lingering sealant barrier.
Staining and Sealing: Choosing the Right Finish and Application
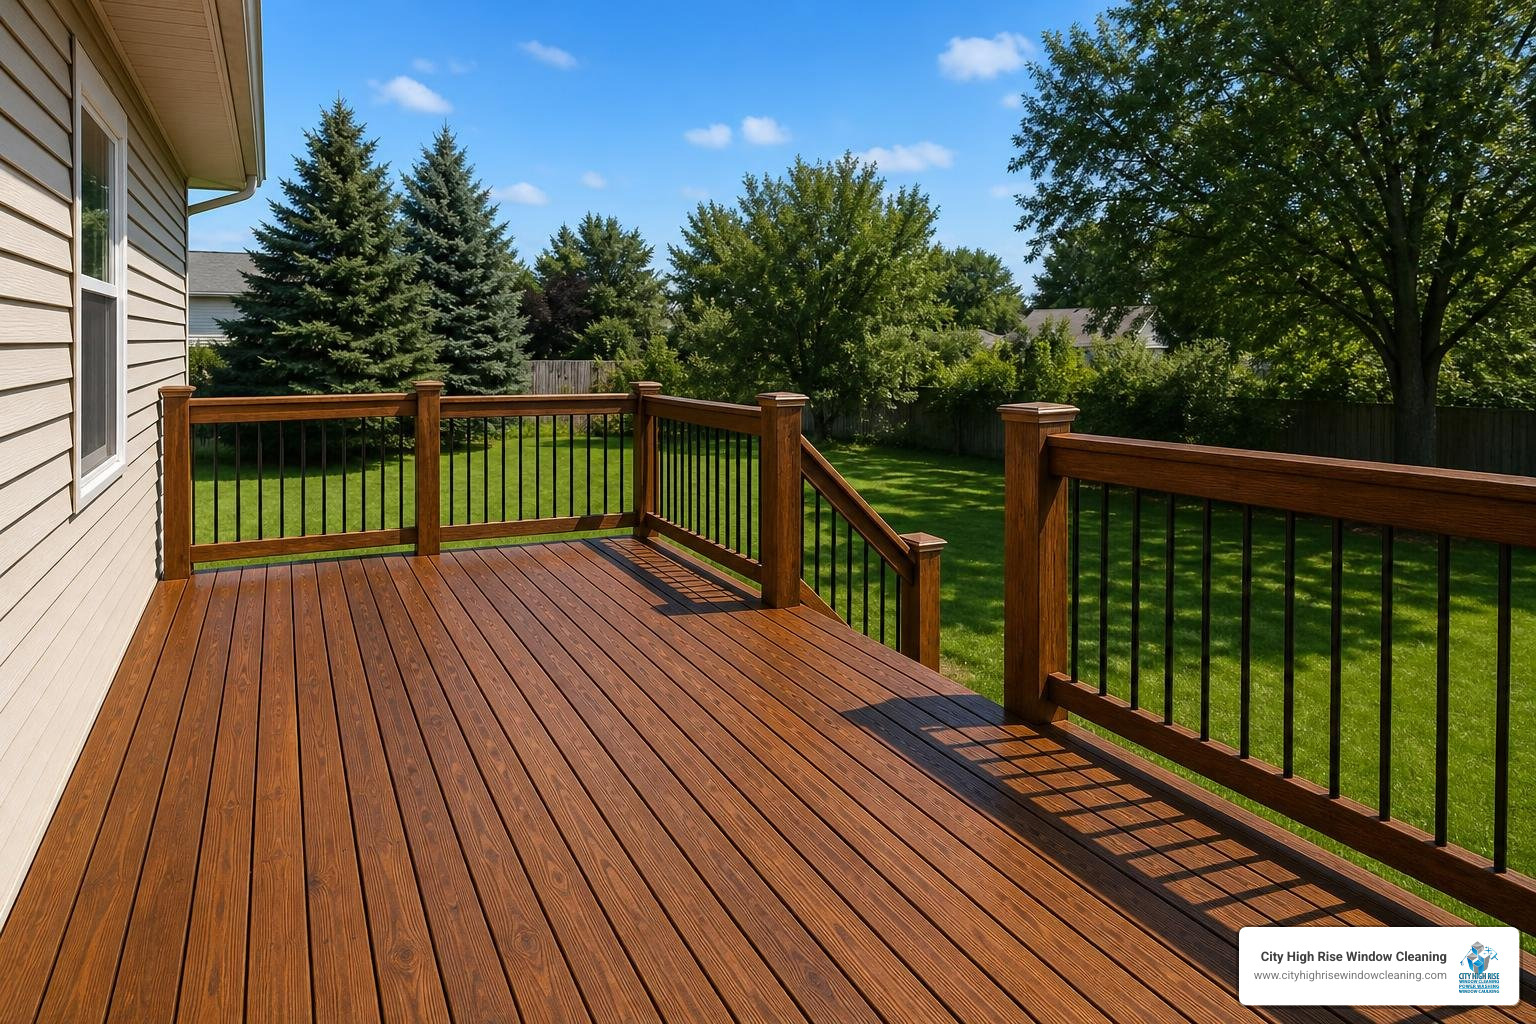
Choosing the right finish depends entirely on the age of your wood, its current condition, and how much natural wood grain you want to see.
- Clear Sealers: Offer excellent moisture protection but almost zero UV protection. Your wood will still turn gray within a year. Best for brand-new, premium hardwoods where you want to preserve the natural look and don’t mind annual maintenance.
- Semi-Transparent Stains: Contain light pigments that tint the wood while letting the natural grain and texture show through. They require recoating every 2 to 3 years and fade gracefully rather than peeling.
- Solid Stains: Look like flat paint. They completely cover the wood grain (but show the texture) and provide maximum UV protection. They last 3 to 5 years on horizontal surfaces but are prone to peeling if moisture gets trapped underneath.
Stain vs. Paint: Which is Best for Your Deck?
I always advise clients to avoid standard exterior house paint on deck floors. Paint forms a thick, non-breathable film over the wood. Because decks are exposed to rising moisture from the ground beneath them, water gets trapped under the paint layer. When the sun heats the deck, that trapped moisture turns to vapor, expanding and forcing the paint to crack and peel in large sheets.
Stains, especially penetrating oil-based or hybrid formulas, penetrate deep into the wood fibers, allowing the wood to “breathe” and release moisture naturally. If you are looking to protect other areas of your property, you can learn about our specialized painting solutions on our Exterior High Rise Painting Services page.
Why Professional Deck Power Washing and Staining Saves You Money
While a DIY deck project sounds like a fun weekend plan, it often ends in frustration, ruined wood, or premature coating failure.
The tri-state climate is incredibly harsh. Our freezing winters, humid summers, and coastal salt air in Long Island require commercial-grade chemicals, precise pH balancing (using oxalic acid to restore the wood’s natural acidity after stripping), and industrial sanding equipment.
By hiring a professional, you avoid the cost of buying specialized equipment, ensure the job is done safely, and get a finish that lasts twice as long as a standard DIY application.
Frequently Asked Questions
Can you pressure wash composite decking?
Yes, but only under extremely low pressure (under 300 PSI) using a soft-wash method. High-pressure washing can scratch, gouge, or permanently scar composite materials and may void your manufacturer’s warranty. Always use a dedicated composite cleaner and a soft-bristle brush.
Should you stain or seal a deck first, and do you need both?
You should always stain first. Modern premium deck stains are formulated as “stain and sealer” combos, meaning they color and seal the wood in a single step. You do not need to apply a separate sealer over a quality deck stain. Never apply a sealer first, as it will block the stain from penetrating the wood.
How long should you wait after power washing before staining a deck?
You must wait at least 48 hours under dry, sunny conditions. If the weather is humid, overcast, or cool, it may take up to 5 to 7 days for the wood to dry thoroughly. The wood’s moisture content must be below 12% before applying any stain.
How often should you pressure wash and restain a deck?
To maintain optimal protection, you should wash your deck annually to remove mold and mildew. Semi-transparent stains should be reapplied every 2 to 3 years, while solid stains on horizontal surfaces typically last 3 to 5 years before requiring a refresh.
Conclusion
Your deck is an extension of your home – a place for family gatherings, morning coffee, and summer barbecues. Don’t let seasonal weathering turn it into an expensive structural liability. With proper preparation, the right tools, and a disciplined approach, your deck can look brand new and remain protected for years to come.
At City High Rise Window Cleaning, we bring over 30 years of exterior restoration expertise to every project. Whether you have a cedar deck in Westchester, an ipe boardwalk in Long Island, or a rooftop terrace in NYC, our team delivers professional results backed by our 100% customer satisfaction guarantee. To learn more about our hot-water cleaning capabilities, visit our High-Rise Hot Water Power Washing Service page.
Ready for a free quote? City High Rise Window Cleaning offers 24/7 live consultation.


