

How to Pressure Wash a House Without Making a Mess
How to Pressure Wash a House Without Making a Mess
Stop Ruining Your Siding: The Best Way to Pressure Wash a House
The best way to pressure wash a house starts with matching your method, pressure, and cleaning solution to your specific siding material — then following a strict top-down rinse sequence to avoid streaks, water damage, and costly repairs.
Here’s the quick version:
- Identify your siding type (vinyl, wood, brick, stucco) and set PSI accordingly
- Prep the area — cover plants, seal windows, and shut off exterior outlets
- Apply cleaning solution bottom to top to prevent streaking
- Let it dwell for 10–15 minutes without letting it dry
- Rinse top to bottom at a 45-degree downward angle, keeping the nozzle 12–18 inches from the surface
- Never use a ladder — use a telescoping wand for high areas instead
Get those steps wrong and you risk cracking siding, forcing water behind panels, or stripping paint. Done right, a single afternoon can strip years of mold, grime, and oxidation from your home’s exterior.
I’m Brett Hochman, CEO of City High Rise Window Cleaning, and with over 48 years of exterior building maintenance experience across New York City, Long Island, New Jersey, and Westchester, I’ve seen every mistake homeowners make when trying to find the best way to pressure wash a house — and I’ll walk you through exactly how to avoid them. Let’s start with the most misunderstood part of the whole process: understanding which cleaning method your home actually needs.
Related content about best way to pressure wash a house:
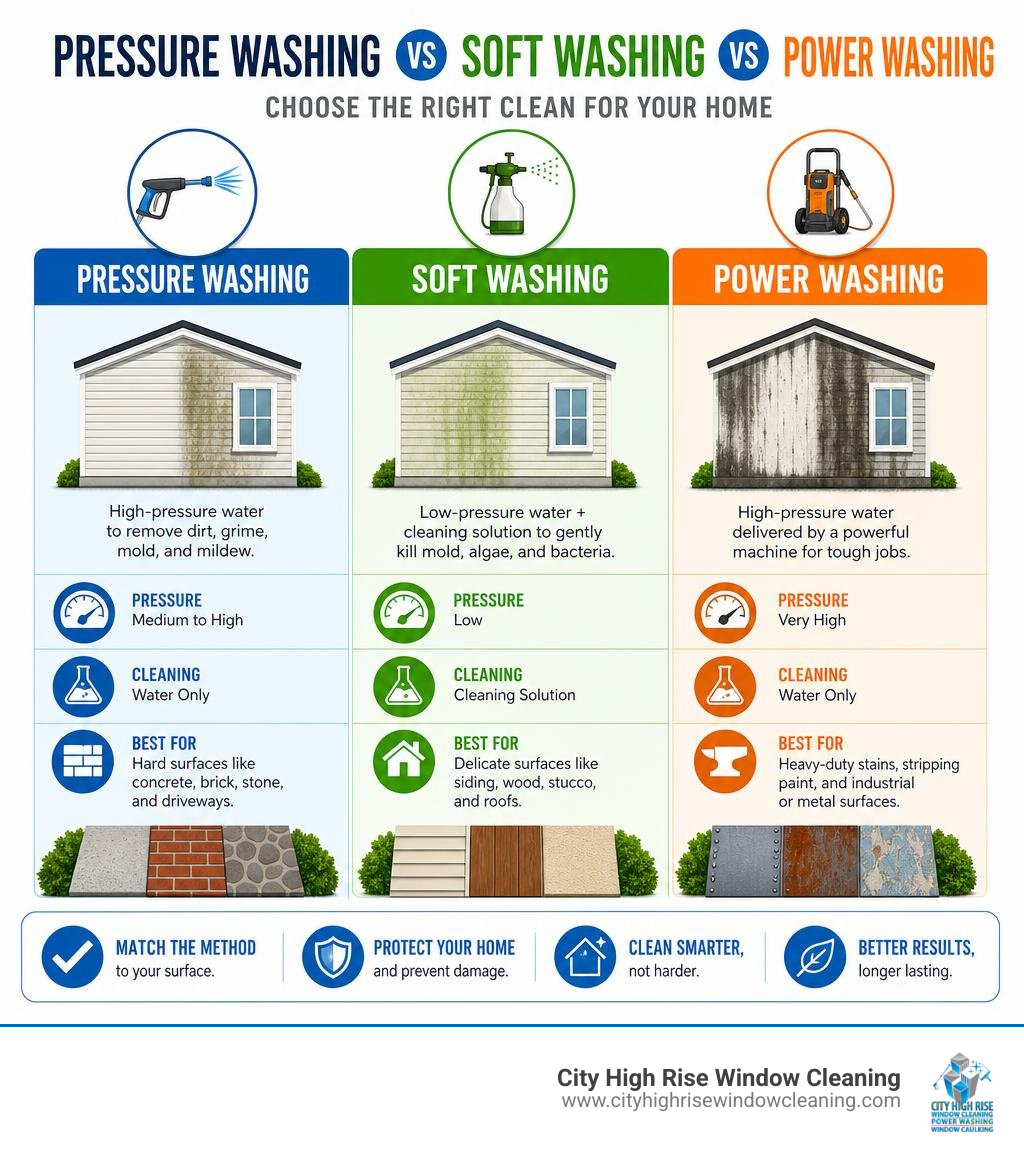
Pressure Washing vs. Power Washing vs. Soft Washing
Before you hook up a machine and start blasting, you must understand that “blasting” is rarely the answer. In our industry, we distinguish between three primary methods. Choosing the wrong one can easily void your siding warranty or strip the mortar right out of your brick walls.
| Method | Water Temperature | Pressure Level | Best Used For |
|---|---|---|---|
| Pressure Washing | Cold water | High (1,500 – 3,000+ PSI) | Concrete driveways, stone patios, durable brick |
| Power Washing | Heated water | High (1,500 – 3,000+ PSI) | Heavy grease, commercial concrete, chewing gum removal |
| Soft Washing | Cold water | Low (under 1,000 PSI) | Vinyl siding, wood, stucco, asphalt shingles |
To dive deeper into these distinctions, you can read our comprehensive guide on Everything You Need to Know About Professional Power Washing Service.
The fundamental rule of residential exterior cleaning is the 90% Rule: roughly 90% of residential homes have siding materials (like vinyl, wood, or stucco) that should never be subjected to high-pressure water. Instead, they require soft washing.
Soft washing relies on specialized chemical solutions rather than raw physical force to melt away dirt. The active ingredients—usually a diluted mix of sodium hypochlorite (bleach) and a surfactant—kill organic growth like mold, mildew, and algae at the source. High pressure alone might knock the tops off the mold spores, but it leaves the roots alive, leading to rapid regrowth.
For severe green staining on shaded, north-facing walls, a dedicated Algae Removal Power Washing approach using low-pressure chemical application is the safest and most effective strategy.
Pre-Wash Prep: How to Protect Your Home and Landscaping
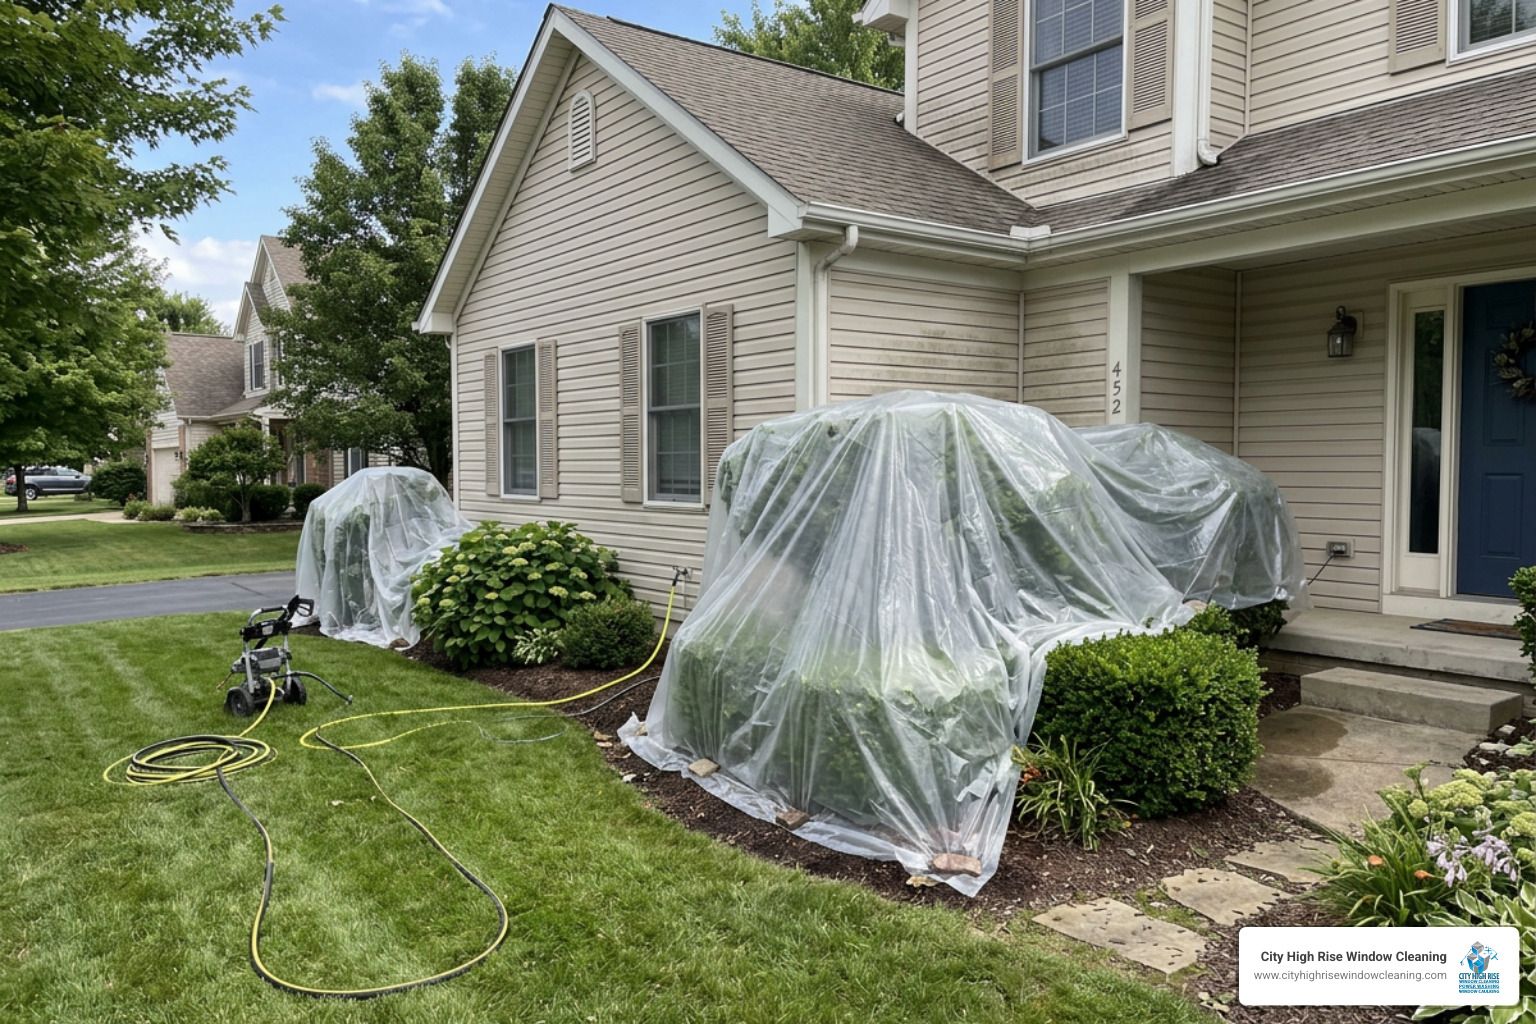
Preparation is the absolute foundation of a successful, mess-free wash. High-pressure water and chemical runoff do not discriminate; they will happily destroy your prized hydrangeas, fry your outdoor electrical outlets, and flood your living room if you don’t take proper precautions.
1. Plant and Landscaping Protection
The sodium hypochlorite used in effective house washing solutions can scorch leaves and kill root systems if left unchecked.
- Pre-Wet Everything: Before you apply any cleaning solution to the house, thoroughly soak all surrounding plants, grass, shrubs, and flower beds with clean water from a garden hose. Wet leaves cannot absorb the soapy runoff as easily as dry ones.
- Cover Delicate Flora: Use lightweight plastic tarps or drop cloths to cover delicate landscaping. Do not leave plastic on plants for too long on hot days, as it can trap heat and bake them.
- Post-Wash Rinse: Once you finish washing a section of the house, immediately rinse the surrounding plants again with clean water to dilute any chemical runoff.
2. Electrical Outlets and Fixtures
- Shut off the power to all exterior electrical outlets at the breaker box.
- Cover outdoor outlets, light fixtures, and doorbells with plastic wrap and heavy-duty painter’s tape or duct tape.
- Ensure all windows and doors are tightly closed. If you have older, drafty windows, seal the edges with painter’s tape.
3. Equipment Setup and Chemical Application
Rather than carrying a heavy 5-gallon bucket of chemicals around your yard, professionals use a downstream injector. This handy brass accessory attaches to the discharge side of your pressure washer pump. It uses the Venturi effect to siphon your chemical mixture directly into the water stream only when using the low-pressure black soap nozzle. This ensures your chemicals bypass the pump entirely, preventing internal machine damage.
The Best Way to Pressure Wash a House: Siding-Specific PSI and Nozzles
Using the wrong nozzle is the fastest way to turn a simple cleanup into an expensive home repair. Pressure washer nozzles are universally color-coded to indicate their spray angles:
- Red (0-degree): A laser-like, highly concentrated stream. Never use this on a house. It will easily slice through vinyl siding, gouge wood, and shatter window glass.
- Yellow (15-degree): High pressure, narrow fan. Best for concrete or brick restoration.
- Green (25-degree): Medium pressure, moderate fan. Great for durable vinyl siding or concrete.
- White (40-degree): Low pressure, wide fan. Best for delicate wood, stucco, and aluminum.
- Black (65-degree): Low-pressure soap nozzle used to apply detergents.
To learn more about equipment selection and nozzle setups, check out the expert breakdown on How to Pressure Wash a House.
The Best Way to Pressure Wash a House with Vinyl or Aluminum Siding
Vinyl and aluminum siding are incredibly common across Long Island and Westchester, but they require a gentle touch.
- Vinyl Siding: Can withstand up to 2,500 to 3,000 PSI if durable, but safe residential practice is to dial it down to 1,300 to 1,600 PSI using a 25-degree (green) nozzle. High pressure can crack vinyl panels, drive water behind the siding seams (leading to hidden rot and mold), and void the manufacturer’s warranty.
- Aluminum Siding: Much softer than vinyl. Keep pressure limited to 1,200 to 1,500 PSI using a 40-degree (white) nozzle. High pressure can easily dent aluminum panels or strip away the factory-painted finish, leaving ugly, chalky oxidation streaks.
If you live in Nassau or Suffolk County, check out our localized tips on House Power Washing Long Island to deal with local coastal salt air and humidity.
The Best Way to Pressure Wash a House with Wood, Brick, or Stucco
- Wood Siding & Cedar Shakes: Soft-grain wood is highly susceptible to gouging. Keep your pressure between 1,200 and 1,500 PSI and use a wide 40-degree (white) nozzle. Always spray in the direction of the wood grain to avoid raising the wood fibers. Keep the wand at least 18 to 24 inches away from the surface.
- Brick and Mortar: While brick is durable, old mortar joints are incredibly fragile. Keep pressure between 1,500 and 2,000 PSI and avoid spraying mortar joints directly at a 90-degree angle.
- Stucco: Traditional and synthetic (EIFS) stucco are highly porous and easily damaged. Never exceed 1,200 to 1,500 PSI, use a 40-degree nozzle, and keep the wand at least 24 inches away. High pressure will literally blast the textured finish right off the wall.
For a detailed step-by-step breakdown on handling these delicate materials safely, refer to How to Pressure Wash a House: A Step-by-Step Guide.
Step-by-Step Technique for a Mess-Free Clean
Now that your home is prepped and you have selected the correct nozzle, it is time to wash. The technique you use determines whether you get a spotless, professional finish or a streaky, water-damaged mess.
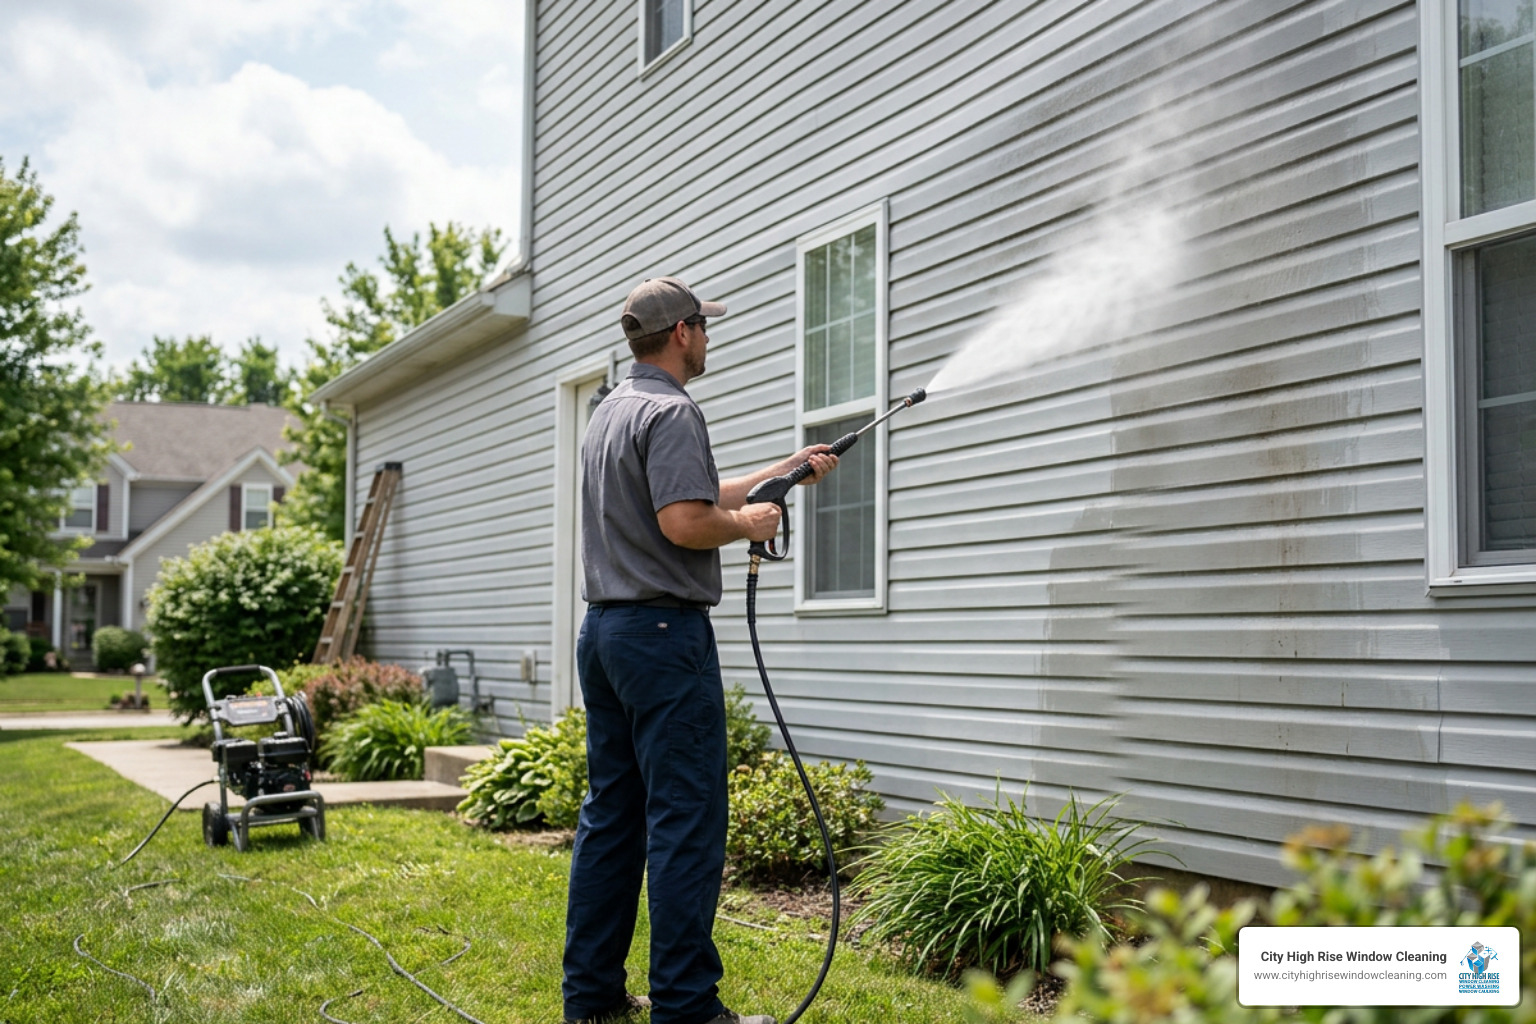
The Golden Rule: Bottom-Up Soap, Top-Down Rinse
This is the most critical technical concept in house washing. If you apply soap from the top down, the cleaning solution will run down the dry siding, creating clean “channels.” When you go to rinse, those soapy run-down lines will have baked into the dry siding, leaving permanent, unsightly streak marks.
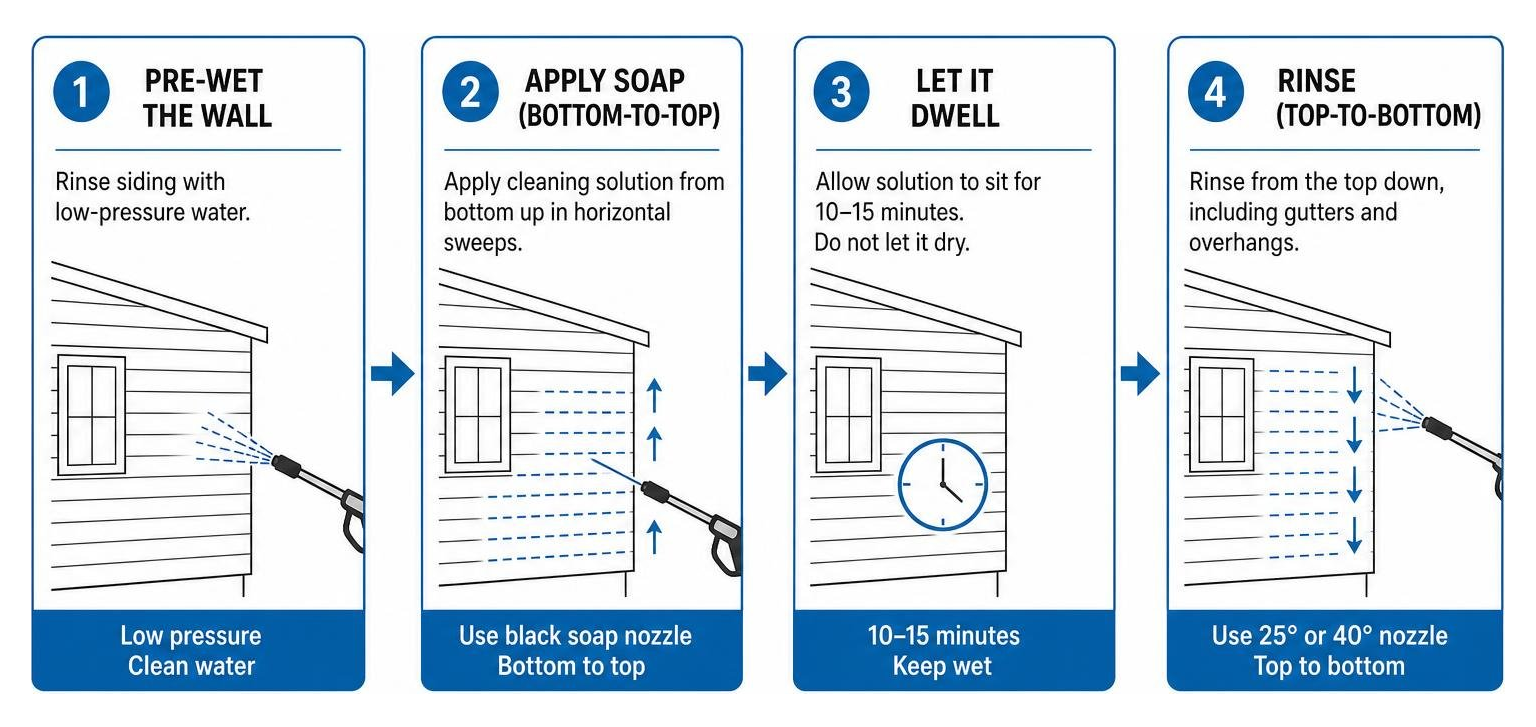
- Pre-Wet the Wall: Give the dry siding a quick, low-pressure rinse with clean water. This cools the siding down (preventing soap from drying too fast) and ensures the chemicals don’t absorb too deeply into porous wood or brick.
- Apply Soap (Bottom-to-Top): Using your black soap nozzle, apply your cleaning solution starting at the bottom of the wall and working your way up in horizontal, sweeping motions. Work in manageable 10-foot-wide sections.
- Let it Dwell: Allow the solution to sit on the siding for 10 to 15 minutes. This gives the chemicals time to break down the mold and dirt. Crucial: Do not let the soap dry on the siding. If it starts to dry (especially on hot or windy days), mist it lightly with water to keep it wet.
- Rinse (Top-to-Bottom): Switch to your rinsing nozzle (25-degree or 40-degree). Start at the very top of the wall—including the gutters and overhangs—and rinse downward. This washes all the dirty soap residue down over already-cleaned surfaces, leaving a streak-free shine.
Angle and Distance
Never spray water directly at a 90-degree angle into siding seams or under the overlaps of vinyl panels. This forces water behind the siding, soaking your home’s wood sheathing and insulation. Instead, always hold the spray wand at a 45-degree downward angle to the wall. Keep the nozzle a consistent 12 to 18 inches away from the siding, overlapping each horizontal pass by about 30% to prevent “tiger striping.”
Say No to Ladders
Operating a pressure washer on a ladder is incredibly dangerous. The sudden recoil force (kickback) when you pull the trigger can easily knock you off balance, leading to a catastrophic fall. Instead, use a telescoping extension wand or a rolling scaffold setup to reach second-story areas safely from the ground.
Cost, Time, and When to Hire a Professional
While DIY pressure washing is highly rewarding, it is important to weigh the real investment of time and money against professional options.
The True Cost of DIY vs. Professional Cleaning
- DIY Rental: Renting a commercial-grade gas pressure washer costs around $80 to $120 per day. Once you add in the cost of professional hoses, extension wands, safety gear, and cleaning detergents, a typical DIY project costs about $200 to $230 in supplies.
- DIY Time: For a beginner, pressure washing a typical 2,000-square-foot home will take between 4 to 6 hours of physical, wet labor (not including prep and cleanup).
- Professional Cost: Hiring a professional service typically costs between $0.15 to $0.30 per square foot, which translates to $300 to $600 for a standard 2,000-square-foot home.
- Professional Time: A professional crew equipped with high-volume, commercial soft-wash systems can clean that same house safely in 1 to 2 hours.
To see a complete breakdown of commercial and residential pricing structures, read The Real Cost of Clean Average Pressure Washing Rates Explained.
When You Absolutely Must Hire a Professional
You should skip the DIY route and call in the pros if your home meets any of the following criteria:
- Multi-Story Homes: Anything taller than two stories requires specialized high-reach equipment, rigging, or professional scaffolding to clean safely.
- Delicate or Historic Materials: Historic brick, weak lime mortar, natural stone veneer, or delicate stucco are easily ruined by inexperienced hands.
- Lead Paint Hazards (Pre-1978 Homes): If your home was built before 1978, it likely contains lead paint. Federal EPA RRP (Renovation, Repair, and Painting) rules require certified contractors to handle wash water and debris to prevent environmental contamination.
- Severe Mold Behind Siding: If you notice mold or mildew blooming out from underneath your siding panels, you have a water infiltration issue that high-pressure washing will only worsen.
Frequently Asked Questions About House Washing
How often should you pressure wash your house?
Generally, you should wash your house once a year to prevent dirt and organic buildup from causing permanent staining or structural damage. In areas like Long Island, coastal New Jersey, and Westchester, high humidity, spring pollen, and winter road salt can accelerate grime accumulation, making an annual spring clean highly beneficial.
What is the best cleaning solution for pressure washing a house?
The industry standard for removing organic growth (mold, mildew, algae) is a mixture of sodium hypochlorite (household bleach) and a surfactant. A highly effective DIY recipe is:
- 1 part bleach to 9 parts water (for light cleaning) or up to a 1:1 ratio (for heavy mold)
- 2 ounces of blue Dawn dish soap per gallon of mix (acts as a surfactant to help the bleach cling to vertical walls instead of running off instantly).
- Note: Never mix bleach with ammonia-based products, as it creates toxic chloramine gas.
Can you use a pressure washer on a ladder?
Absolutely not. The recoil force generated by pulling the trigger on a pressure washer can easily throw you off balance. Always keep your feet firmly planted on the ground and utilize a telescoping extension wand or scaffolding to reach high facades.
Conclusion
Finding the best way to pressure wash a house doesn’t require brute force; it requires the right chemistry, the correct nozzle, and a safe, methodical technique. By choosing low-pressure soft washing for your siding, protecting your beautiful landscaping, and washing from the bottom-up while rinsing from the top-down, you can achieve professional, streak-free results without making a mess or damaging your home.
However, if your home is multi-story, has delicate historic masonry, or you simply want to save your weekend, hiring an experienced professional is the smartest choice. At City High Rise Window Cleaning, we bring over 30 years of exterior restoration experience to every project across New York City, Long Island, New Jersey, and Westchester. We back all our work with a 100% customer satisfaction guarantee and a strict commitment to safety.
If you are planning to refresh your home’s exterior, consider pairing your wash with our specialized High-Rise Hot Water Power Washing Services to bring back that original, pristine curb appeal.


