

The Ultimate Guide to Painting High Walls and Ceilings with Ease
The Ultimate Guide to Painting High Walls and Ceilings with Ease
How to Paint High Walls Fast (Without Hiring a Pricey Pro): Save 40% on Your Next NYC/NJ Project
How do you paint high walls and achieve a professional finish without the fear of falling or leaving streaks? Whether you’re tackling a two-story foyer in your New York City brownstone, refreshing a vaulted ceiling in a New Jersey commercial lobby, or painting above a stairwell in a Long Island residence, the answer lies in the right safety equipment, proper preparation, and proven painting techniques.
Here’s the quick answer:
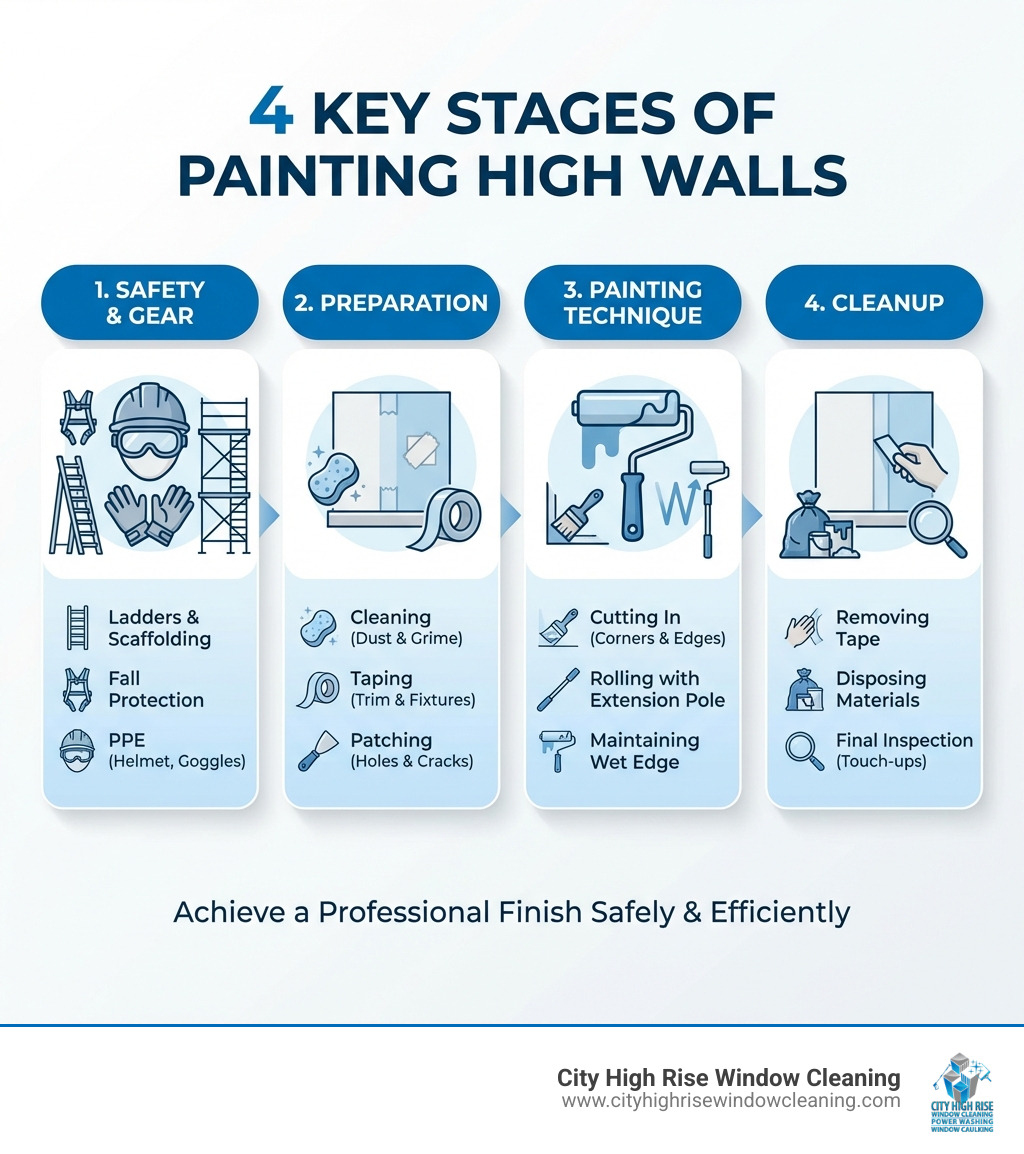
- Choose the Right Equipment – Use a stable ladder or scaffolding, plus extension poles (4-18 feet) to minimize time at height.
- Prep Your Space – Cover floors, tape trim, clean walls, and patch any holes before you start.
- Cut In First – Use an angled brush on an extension pole to paint edges, corners, and where walls meet the ceiling.
- Roll from Top to Bottom – Attach a roller to an extension pole and paint in overlapping “W” patterns, maintaining a wet edge to avoid streaks.
- Apply Multiple Coats – Allow each coat to dry fully (typically 4 hours) before applying the next.
- Know When to Call a Pro – For walls over 20 feet, exterior high-rise projects, or complex architectural features, hire professionals with proper safety rigging.
Painting high walls can feel intimidating. As one DIYer put it: “I have been avoiding the stairway remodel for way too long. Why avoid such a small room? Because I was afraid to paint those tall walls and ceiling!” But with the right approach, it’s absolutely manageable.
I’m Brett Hochman, CEO of City High Rise Window Cleaning, and I’ve spent over 48 years in the exterior building maintenance industry, including countless high-wall and facade painting projects across New York, New Jersey, and Long Island. Understanding how do you paint high walls safely and effectively is critical not just for aesthetics, but for protecting your building investment and ensuring compliance with local safety codes.
Safety First: Gearing Up for the Height
Safety isn’t just a buzzword when you’re working at heights; it’s the absolute foundation of a successful project. Before I even think about paint colors or techniques, my primary concern is always ensuring a stable and secure work environment. Trust me, a little extra time spent on safety prep can prevent a lot of headaches (and worse!) down the line. When you ask how do you paint high walls, the first answer should always be: safely. For a deeper dive into our safety protocols, you can read our guide on The Importance of OSHA Compliance in High-Rise Maintenance.
Ladder Safety
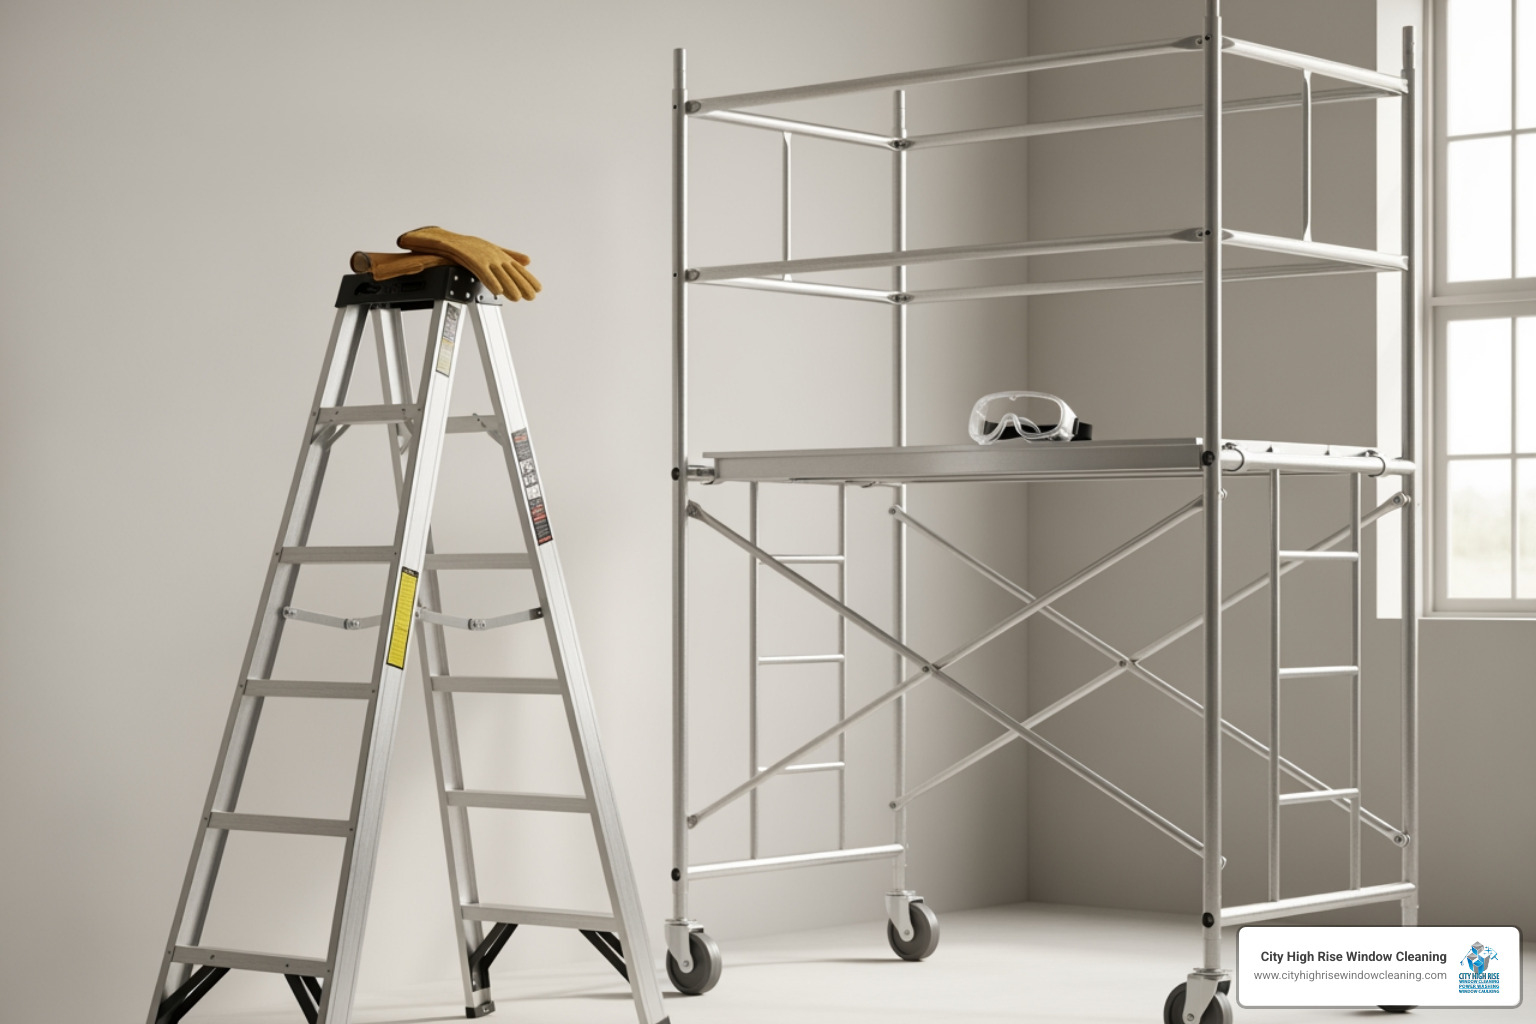
For walls up to about 10-12 feet, a sturdy ladder is often your go-to. But not just any ladder will do. I recommend a multi-position articulating ladder or a stable platform ladder. These offer more stability and a larger standing surface than traditional stepladders, which is crucial when you’re reaching for those high spots. For walls over 10 feet, an extension ladder might be necessary. A good rule of thumb is that for every four feet of height, the base of your ladder should be one foot away from the wall, creating a safe 75-degree angle.
- Inspection is Key: Always inspect your ladder before use. Look for loose rungs, cracks, or damaged feet.
- Stable Surface: Place the ladder on a firm, level surface. If you’re working on stairs, a ladder leveler is an absolute lifesaver. It adjusts to uneven surfaces, making ladder placement safer and easier.
- Three-Point Contact: Maintain three points of contact (two hands and one foot, or two feet and one hand) when climbing or descending.
- Don’t Overreach: Never lean too far to the side. It’s better to move the ladder frequently than to risk losing your balance.
- Ladder Mitts: These protective covers for the top of your ladder prevent scratches and scuffs on your freshly painted walls.
Scaffolding
When walls soar beyond 12-15 feet, or if you anticipate prolonged work at height, scaffolding becomes your best friend. It provides a wide, stable platform that allows you to move freely, keep your tools organized, and work more efficiently. For two-story foyers or very high ceilings, renting indoor scaffolding is often the safest and most effective solution. As one painting pro mentioned, for 20-foot walls, a lift (which is similar to scaffolding in terms of providing a stable platform) combined with a sprayer is ideal.
Extension Poles
Even with the best ladders or scaffolding, you’ll want extension poles for your rollers and brushes. These typically range from 4 to 18 feet and are invaluable for reaching high areas without constantly repositioning your ladder. They reduce fatigue and allow for more consistent paint application. My personal tip: make sure your extension pole is robust enough not to flex excessively when fully extended, especially when loaded with a paint-filled roller.
Personal Protective Equipment (PPE)
Don’t skip the PPE! It’s not just for professionals on high-rise buildings; it’s for anyone working with paint and at heights.
- Safety Goggles: Protect your eyes from paint splatters and dust.
- Gloves: Keep your hands clean and protected from paint chemicals.
- Non-Slip Shoes: Essential for stability on ladders and scaffolding.
- Dust Mask/Respirator: If you’re sanding or using a paint sprayer, protect your lungs.
- Head Covering: A simple cap can keep paint out of your hair (and off your scalp!).
Here’s a quick comparison to help you decide between ladders and scaffolding for your project:
| Feature | Ladders | Scaffolding – |
| Best For | * Walls up to 12-15 feet.
* Shorter duration tasks.
* Projects where frequent repositioning is needed.
* Stairwells with ladder levelers. | * Walls over 15 feet.
* Two-story foyers, vaulted ceilings.
* Longer duration projects.
* Tasks requiring multiple tools or materials at height. |
| Safety Concerns | * Risk of falling if not properly secured or if overreaching.
* Limited space for tools/materials.
* Fatigue from prolonged standing on rungs.
* Requires frequent repositioning. | * Proper assembly and securing are crucial.
* Can be bulky to set up and move.
* Requires more space in the room.
* Renting may be necessary for larger units. |
The Prep Work: Setting the Stage for a Flawless Finish
I can’t stress this enough: proper preparation is not just a suggestion; it’s the secret sauce to a professional-looking paint job. Skipping this step is like trying to build a skyscraper on a sandy foundation – it simply won’t hold up. When I’m overseeing a project, whether it’s power washing a facade or painting a high interior wall, the prep work is where we lay the groundwork for excellence.

Cleaning Walls
Before any paint touches the surface, those high walls need to be spotless. Dust, cobwebs, and grime love to accumulate in high, neglected areas. I typically use a broom or a duster with an extension handle to clear away all the loose debris. For any stubborn spots or greasy residue, a quick wash with a sponge and a mild detergent solution is in order. Make sure to rinse thoroughly with clean water and allow the walls to dry completely before moving on. This ensures optimal paint adhesion and prevents unsightly bumps and blemishes.
Patching Holes
Even in the most pristine homes or commercial spaces in Westchester, small nail holes or minor imperfections can detract from a flawless finish. Take the time to patch any holes or cracks with spackle or drywall compound. Once dry, sand them smooth and wipe away any dust. This step is crucial for achieving that seamless, professional look.
Protecting Floors and Furniture
This is where you earn your stripes as a meticulous painter. I always use canvas drop cloths instead of plastic on floors. Why? Canvas provides better grip, reducing the risk of slips and falls, and it’s more absorbent, meaning fewer puddles of spilled paint. Plastic sheeting, however, is excellent for covering furniture, light fixtures, and anything else you want to keep pristine. For stairwells, secure your drop cloths by taping or tying them around banisters – you don’t want them shifting while you’re focused on that high corner.
Taping Trim and Baseboards
Precision is key here. High-quality painter’s tape is your friend for creating crisp, clean lines where your walls meet trim, baseboards, or other architectural features. Take your time to apply it carefully, pressing down firmly to ensure a tight seal. This will save you hours of touch-up work later. For particularly tricky areas, like ornate molding in a historic New York City building, a “Quick Mask Poly with Tape” can be a fantastic time-saver, combining tape and plastic sheeting in one product.
Removing Fixtures
Temporarily remove any wall hangings, outlet covers, light fixtures, and ceiling fans. If you’re dealing with electrical fixtures, always turn off the power at the breaker box first. It’s much easier (and safer!) to paint a clear surface than to carefully cut around obstacles.
Here’s a checklist of essential prep supplies I always have on hand:
- Drop cloths (canvas for floors, plastic sheeting for furniture)
- Painter’s tape (blue painter’s tape is a classic, or Quick Mask Poly with Tape)
- Spackle or drywall compound
- Putty knife
- Sanding block or sandpaper
- Mild detergent and sponges
- Clean rags
- Screwdriver (for removing fixtures)
- Broom or duster with extension handle
- Ladder (for reaching high cleaning spots)
How Do You Paint High Walls and Ceilings: Techniques for a Pro Look
Now that our space is prepped and safe, it’s time for the main event: applying the paint. This is where I see many DIYers get intimidated, especially when asking how do you paint high walls without leaving roller marks or uneven patches. But with the right technique, you can achieve a result that looks like a professional did it.
Cutting In: Mastering the Edges and Corners
Cutting in is the art of painting neat lines where two surfaces meet, like walls and ceilings, or walls and trim. It’s often the most challenging part, especially when you’re working at height.
- Angled Brushes are Your Ally: I always reach for a high-quality an angled brush. The angled bristles give you more control for crisp lines.
- Extension Pole Adapters: For cutting in those impossibly high ceiling lines, you can attach your angled brush to an extension pole using a specialized adapter. Or, as a clever DIYer once shared, simply tape your brush securely to the end of your extension pole! Make sure it’s stable and doesn’t wobble.
- Paint Edging Tools: These tools can help create a straight line, but for a truly professional finish, I find a steady hand with an angled brush on an extension pole often yields superior results.
- Technique: Load your brush with paint (don’t overload it to avoid drips!), and use smooth, controlled strokes. For high ceilings, I cut in a band of paint about 2-3 inches wide along the perimeter before rolling.
Painting the Ceiling First
My general rule of thumb for any room, especially one with high walls, is to paint the ceiling first. This way, any drips or splatters that fall onto the walls will be covered when you paint the walls later.
- Work from Top to Bottom: Always paint the ceiling first, then the walls, and finally the trim. This prevents drips from ruining finished surfaces.
- Flat Finish Paint: For ceilings, especially high ones, I often recommend a flat finish paint. Flat paint is incredibly forgiving; its lack of sheen helps to hide any minor imperfections, roller marks, or areas where coverage might be slightly uneven – which can be hard to avoid when you’re straining to reach.
- Color-Changing Ceiling Paint: For the ultimate DIY helper, there’s INSL-X® Color Changing Ceiling Paint. This innovative paint goes on pink, making it easy to see where you’ve painted and ensuring you don’t miss any spots. It then dries to a uniform white. It’s a fantastic solution for minimizing mistakes and ensuring even coverage, especially when you’re working from a distance.
For more prep and application tips on challenging building surfaces in New York, Long Island, Westchester, and New Jersey, see our related guide on facade restoration.
Rolling the Walls: How Do You Paint High Walls Without Streaks
Once the ceiling is done and dry, it’s time for the walls. This is where your extension pole truly shines.
- Maintaining a Wet Edge: The key to avoiding unsightly lap marks or streaks is to always maintain a “wet edge.” This means you should always be rolling into paint that is still wet. Work in manageable sections (about 3-4 feet wide) from top to bottom.
- “W” Pattern Rolling Technique: Load your roller well, but not so much that it drips. Apply paint in a “W” pattern, then fill in the empty spaces without lifting the roller. This technique helps distribute the paint evenly.
- Using an Extension Pole: Attach your roller to a sturdy extension pole. Start rolling from the highest point of your wall, working your way down. For very tall walls, some pros recommend working with a partner: one person rolls the top section, and the other immediately follows with the bottom section, ensuring that wet edge is always maintained.
- Primer Necessity: When is primer necessary? Always use a good quality primer if you’re painting over new, unpainted drywall, if you’re making a drastic color change (especially from dark to light), or if the walls have stains that might bleed through your new paint. Primer provides better adhesion, better coverage, and a more uniform final color. It’s an extra step that pays dividends in the final look and longevity of your paint job.
If your high walls are part of a larger building refresh, you may also benefit from professional exterior high rise painting services combined with commercial high rise window cleaning to restore a like-new finish inside and out.
Special Challenges and When to Call a Professional
While many high-wall painting projects are achievable for the ambitious DIYer, some spaces present unique challenges that can quickly turn a weekend project into a headache, or worse, a safety hazard. I’ve seen it all, from homeowners trying to steer precarious ladders in stairwells to those attempting to reach the exterior of their multi-story building. Knowing your limits is crucial.
Tackling Stairwells and Vaulted Ceilings
Stairwells are notorious for being tricky. The varying heights, uneven steps, and often confined spaces make traditional ladder work difficult and dangerous.
- Multi-Position Ladders: For stairwells, a a multi-position ladder is a game-changer. These versatile ladders can be configured to stand securely on uneven surfaces, allowing you to safely reach those high walls and ceilings above the stairs. Remember to wedge it securely and ideally have a spotter.
- Improvised Scaffolding Planks: For larger stairwells or vaulted ceilings that are too high for even a multi-position ladder, some DIYers create improvised scaffolding. This involves using two ladders (one on a stair tread, one on the floor above) and bridging them with a sturdy scaffolding plank. If you go this route, ensure the plank is well-supported, clamped securely, and that you move slowly and carefully. You can even build a nine-inch-wide scaffolding plank using six 2x4s fastened together for extra stability.
- Ladder Levelers: These are indispensable for any ladder work on stairs or uneven ground. They attach to your ladder legs and adjust to different heights, ensuring your ladder remains perfectly level and stable.
Knowing When to Hire a Professional Painter
As much as I encourage homeowners to tackle DIY projects, there comes a point where professional expertise isn’t just convenient; it’s essential.
- Projects Over 20 Feet: If your walls or ceilings exceed 20 feet, especially in a two-story foyer or a commercial space, the safety risks and equipment requirements escalate dramatically. This is firmly in the domain of specialized equipment like large-scale scaffolding or aerial lifts, which require training and certification to operate safely.
- Complex Architectural Details: Ornate moldings, intricate trim, or unusual angles at extreme heights demand a level of precision and skill that is difficult to achieve without extensive experience.
- Exterior High-Rise Painting: This is where my company, City High Rise Window Cleaning, truly shines. Painting the exterior of high-rise buildings in New York City, Long Island, New Jersey, or Westchester is a completely different ballgame. It involves industrial-grade equipment, specialized paints designed to withstand harsh weather, and stringent safety protocols, including rigging and rope access techniques. A professional team has the expertise to steer these challenges safely and efficiently, delivering durable, high-performance coatings that protect your building’s envelope and maintain its value. You can learn More info about our services.
For many property managers and condo boards, combining high rise hot water power washing with window restoration before or after painting delivers the best long-term value and helps avoid premature coating failure.
A beautiful paint job improves your property’s curb appeal and protects it from the elements. For challenging exterior projects, especially in our service areas of New York City, Long Island, New Jersey, and Westchester, professional teams like ours have the required safety rigging and experience. We specialize in exterior high-rise painting services and understand the unique demands of high-altitude work.
Frequently Asked Questions about Painting High Walls
What is the easiest way to paint a high wall?
The easiest and safest way for a DIYer to paint a high wall is by using a high-quality paint roller attached to an extension pole. This allows you to reach most of the wall from the ground, minimizing ladder time. For cutting in edges, you can use a brush taped to the pole or a specialized edging tool. For walls above 12-15 feet, however, a multi-position ladder or even rented scaffolding will make the job significantly easier and safer.
How do you paint a 20-foot wall?
Painting a 20-foot wall typically requires more than a standard ladder. The safest and most efficient method is to use rented indoor scaffolding, which provides a stable, wide platform to work from. For such heights, especially for exterior walls or commercial buildings in New York City, Long Island, New Jersey, or Westchester, we strongly recommend hiring a professional service like our Exterior High Rise Painting Services to ensure safety, proper equipment, and a quality finish. Professionals are equipped with the necessary lifts and safety rigging for these challenging projects.
Do I need to use a primer on high walls?
Yes, using a primer is recommended in several situations: if you are painting over new, unpainted drywall; if you are making a drastic color change (e.g., from dark to light); or if the walls have stains or repairs that might bleed through. A primer ensures better paint adhesion, provides a uniform base for your topcoat, and helps achieve a more vibrant, consistent final color, especially important on large, high surfaces where inconsistencies would be very noticeable.
How do I safely paint high walls over stairs?
Use a multi-position ladder with ladder levelers or properly assembled indoor scaffolding designed for stairwells. Make sure the ladder or scaffold is set on solid footing, have a spotter when possible, and avoid overreaching. If the stairwell height in your New York, Long Island, Westchester, or New Jersey property exceeds what you can safely reach, bring in a professional crew.
What’s the best way to avoid streaks and roller marks on tall walls?
Work in small sections from top to bottom, keep a wet edge, and use the “W” rolling pattern so paint is spread evenly. Don’t let one section dry before you overlap with the next. Higher-quality rollers and paints are worth the investment on tall walls, where imperfections are more visible.
Should I DIY or hire a pro for very high interior walls?
If your walls are under about 15 feet and you’re comfortable on a ladder, DIY can work. Once you’re approaching 20 feet or more, or dealing with complex trim and stairwells, hiring a pro is usually safer, faster, and often cheaper than renting specialized equipment and risking mistakes.
Conclusion
Painting high walls is an achievable DIY project with the right combination of planning, safety, and technique. By gearing up with the proper safety equipment, carefully preparing your space, and using the methods outlined above, you can achieve a beautiful, professional finish that keeps your project on budget and on schedule.
However, always prioritize your safety. For extremely high, complex, or exterior projects that are beyond the scope of a DIY-safe approach, trust the experts. The team at City High Rise Window Cleaning has over 30 years of experience providing safe and reliable exterior high-rise painting services for buildings of all sizes across New York City, Long Island, New Jersey, and Westchester, along with complementary services like post construction cleaning and facade restoration to protect your investment.
Ready for a free quote? City High Rise Window Cleaning offers 24/7 live consultation. Call 917-749-8342 to speak to a live representative.


