

How to Caulk and Seal a Window Sill Like a Pro
Caulking a Window Sill: 5 Pro Steps for 2025
Why Properly Caulking a Window Sill Can Save You Thousands
Caulking a window sill is a cost-effective way to stop energy loss, prevent water damage, and seal your home against the elements. Leaky windows can account for 25% to 30% of home heat loss, according to the Department of Energy, leading to high bills and costly repairs. This guide will show you how to get a professional-grade seal that lasts.
Quick Answer: How to Caulk a Window Sill
- Remove old caulk completely with a putty knife or scraper.
- Clean the surface thoroughly with rubbing alcohol and let it dry.
- Choose the right caulk (silicone for exterior, acrylic latex for interior).
- Apply a smooth bead at a 45-degree angle with a caulking gun.
- Smooth the bead with a wet finger or caulk tool within 5-10 minutes.
- Let it cure for 24 hours before painting or exposing to moisture.
I’m Brett Hochman, CEO of City High Rise Window Cleaning. With over 48 years of experience sealing thousands of windows across New York City, Long Island, New Jersey, and Westchester, I’ve seen how proper caulking protects buildings and improves energy efficiency.
In this guide, I’ll share our team’s exact process for creating a durable, weather-tight seal that stands up to harsh Northeast winters, helping you avoid common mistakes and achieve lasting results.

Choosing the Right Caulk and Tools for the Job
Using the wrong materials for caulking a window sill will lead to premature failure. The caulk for an interior bathroom window won’t survive an exterior sill in a Long Island winter. Let’s review what you need.
What are the different types of caulk available for window sills, and what are their pros and cons?
- Acrylic Latex Caulk: Often called “painter’s caulk,” it’s water-based, paintable, and cleans up easily. Best for interior trim, as it has low flexibility and moisture resistance.
- Siliconized Acrylic Latex Caulk: An upgrade to acrylic latex with added silicone for better flexibility and water resistance. It’s a versatile choice for interiors and some protected exterior areas.
- Silicone Caulk: The workhorse for exterior sills. It’s highly flexible, waterproof, mildew-resistant, and UV-resistant. Most types are not paintable, and cleanup requires mineral spirits. Use neutral-cure silicone for windows.
- Polyurethane Caulk: A heavy-duty option that creates a strong, flexible bond ideal for masonry and high-movement areas. It’s paintable but has a strong odor and can be messy.
- Silane-Modified Polymers (SMPs): A premium hybrid of silicone and polyurethane, offering excellent adhesion, flexibility, weather resistance, and paintability. A great choice for challenging exterior jobs.
What is the best type of caulk for exterior window sills versus interior window sills?
- For exterior window sills: Choose silicone or polyurethane caulk. They handle the temperature swings, sun, and rain common in New York and New Jersey. For sealing against brick or stucco, a quality siliconized acrylic latex or polyurethane is also effective.
- For interior window sills: Use acrylic latex or siliconized acrylic latex caulk. They have low odor, are easy to apply, and provide a paintable finish. For high-humidity areas like bathrooms, ensure the caulk is labeled “mold-resistant” and “waterproof.”
Here’s a quick reference table:
| Caulk Type | Best Use (Interior/Exterior) | Flexibility | Durability | Paintable | Cleanup |
|---|---|---|---|---|---|
| Acrylic Latex | Interior | Low | Low | Yes | Water |
| Siliconized Acrylic Latex | Interior/Some Exterior | Medium | Medium | Yes | Water |
| Silicone | Exterior | High | High | No (Generally) | Mineral Spirits |
| Polyurethane | Exterior | High | High | Yes | Mineral Spirits |
| Silane-Modified Polymers (SMPs) | Exterior | High | High | Yes | Mineral Spirits |
What tools and materials are necessary for caulking a window sill?
Having the right tools makes the job much smoother. Here’s your essential list:
- Dripless caulking gun: Provides better control and prevents messy oozing.
- Utility knife: For cutting the caulk tube tip and removing old caulk.
- Putty knife: Essential for scraping away old caulk and loose paint.
- Caulk-smoothing tool: Creates a consistent, professional-looking bead.
- Cleaning rags or paper towels: For immediate cleanup.
- Foam backer rod: For filling gaps wider than 1/4 inch to support the caulk.
- Painter’s tape: Optional but recommended for creating clean, straight lines.
Step 1: Prepare the Window Sill for a Perfect Seal
The success of caulking a window sill depends almost entirely on preparation. Applying new caulk over old, dirty surfaces is the number one cause of failure. Don’t skip these steps.
How do you properly prepare a window sill for caulking, including removing old caulk and cleaning the surface?
1. Remove All Old Caulk: This is non-negotiable. New caulk will not bond to old, failing caulk. Use a utility knife to score the edges and a putty knife to scrape it away. For stubborn caulk, a caulk remover solvent or a heat gun can help (use caution on vinyl or painted surfaces).
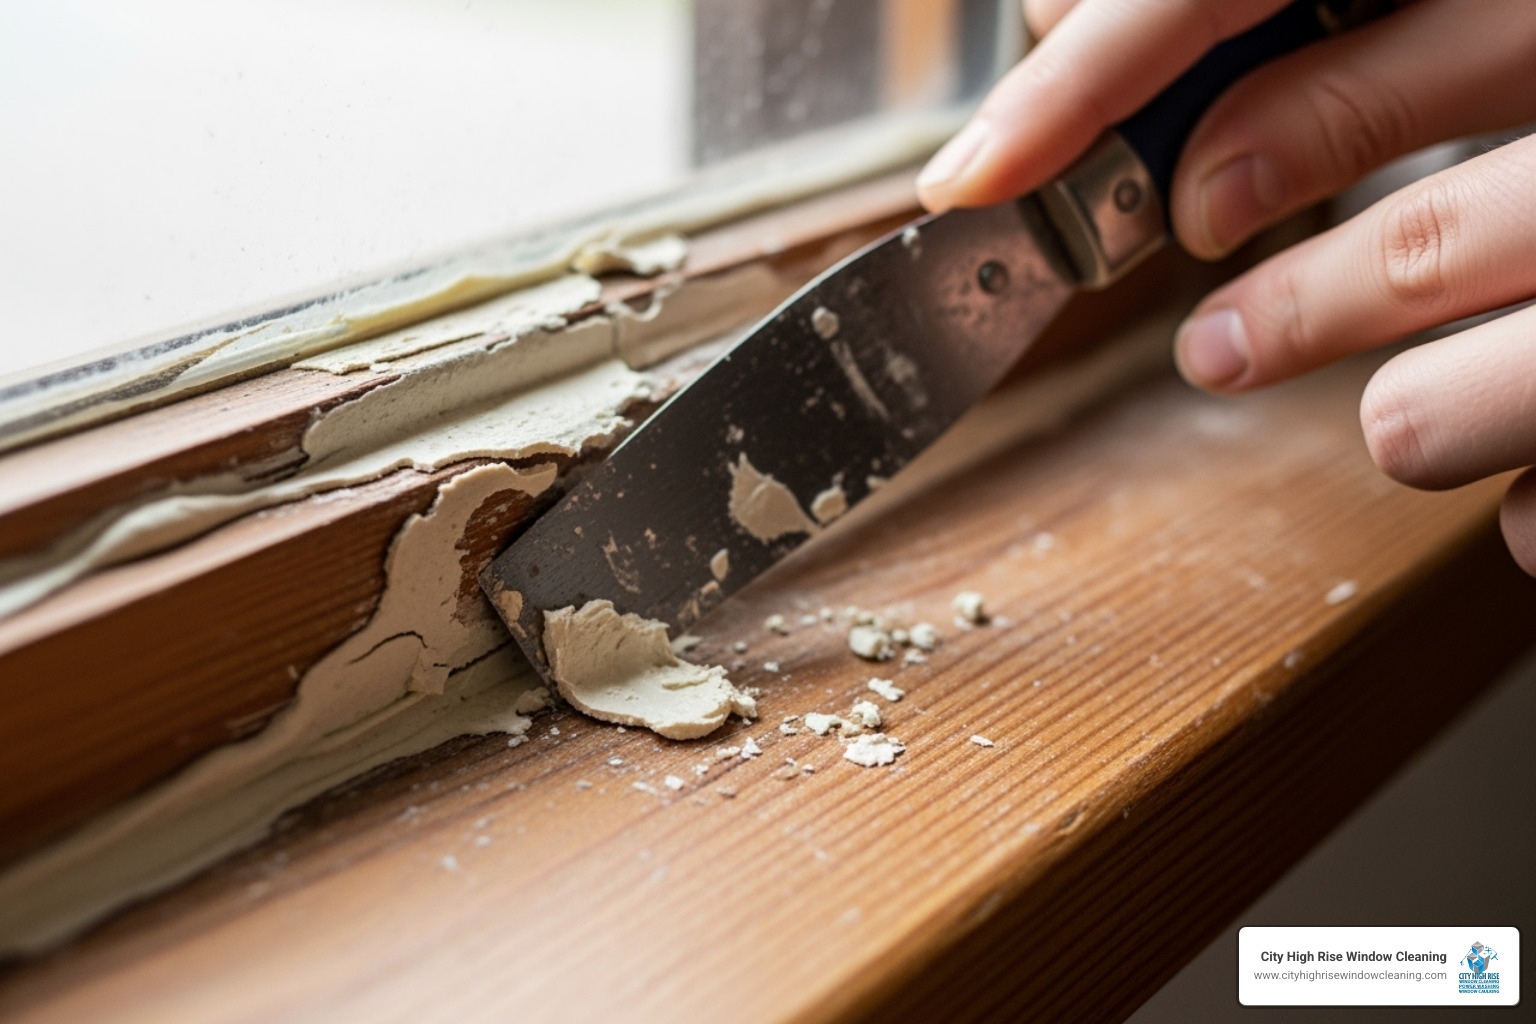
2. Clean the Surface: Scrape away any loose paint or debris. Wipe the joint with a cleaning rag and rubbing alcohol to remove oils and residue. Let it dry completely.
3. Fill Large Gaps: For gaps wider than 1/4 inch, insert a foam backer rod. This supports the caulk and prevents sagging.
4. Tape for Clean Lines: Apply painter’s tape on both sides of the joint for a sharp, professional finish.
What are the ideal weather conditions for caulking window sills?
Weather is critical for a lasting seal. Energy.gov recommends caulking windows during dry weather when the temperature is above 45°F. Most products work best between 40°F and 90°F. Avoid applying caulk if rain is expected within 24-48 hours, as moisture prevents proper curing. For those in the NYC metro area, spring and fall offer the best conditions.
Step 2: The Right Way of Caulking a Window Sill
With your surface prepped, it’s time to apply the caulk. A steady hand and the right technique will ensure a smooth, effective seal.
How to properly apply caulk to a window sill
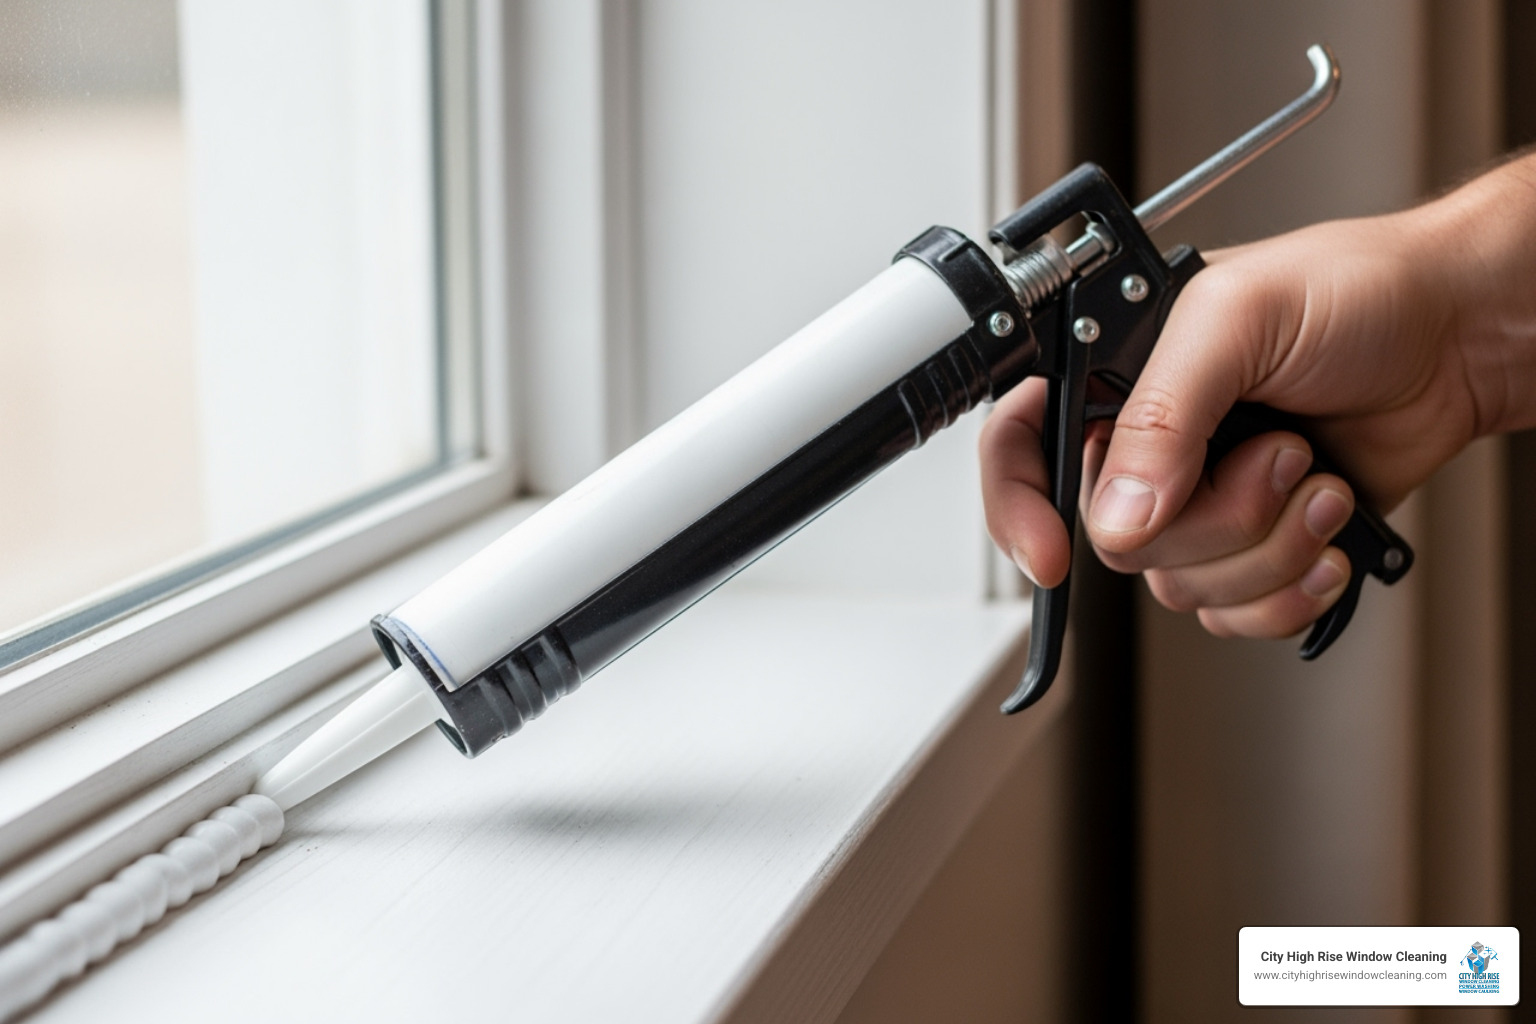
- Prepare the Caulk Tube: Cut the nozzle tip at a 45-degree angle, starting with a small opening. Puncture the tube’s inner seal with the metal rod on your caulk gun or a long nail.
-
Apply with Steady Pressure: Load the tube into your caulking gun. Hold the gun at a 45-degree angle to the joint, which pushes caulk into the gap. Squeeze the trigger with consistent pressure and move smoothly along the joint. Work in manageable sections of 2-3 feet.

-
Fill the Gap Completely: Ensure the caulk fully penetrates the gap to create an airtight and watertight barrier. Don’t just skim the surface.
How to smooth the caulk bead for a professional finish
Smoothing, or “tooling,” forces the caulk into the joint and creates a clean look. You must do this within 5-10 minutes before the caulk starts to form a skin.
- Choose Your Tool: A dedicated caulk smoothing tool gives the most consistent results. Alternatively, you can use a wet finger (for water-based caulk), a plastic spoon, or a popsicle stick.
- Smooth the Bead: Run your tool along the bead in one continuous motion. Wipe any excess caulk from your tool onto a paper towel immediately.
- Remove Painter’s Tape: If you used tape, remove it immediately after smoothing while the caulk is still wet. Pull it away from the bead at a 45-degree angle to avoid ruining your clean line.
Step 3: Avoid Common Mistakes and Maintain Your Seal
Even with the right tools and materials, a few common mistakes can lead to a failed seal. Here’s what to avoid and how to maintain your work.
What are common mistakes to avoid when caulking window sills?
- Caulking Over Old Caulk: Never apply new caulk over old. It won’t bond properly and will fail quickly. Always remove the old material completely.
-
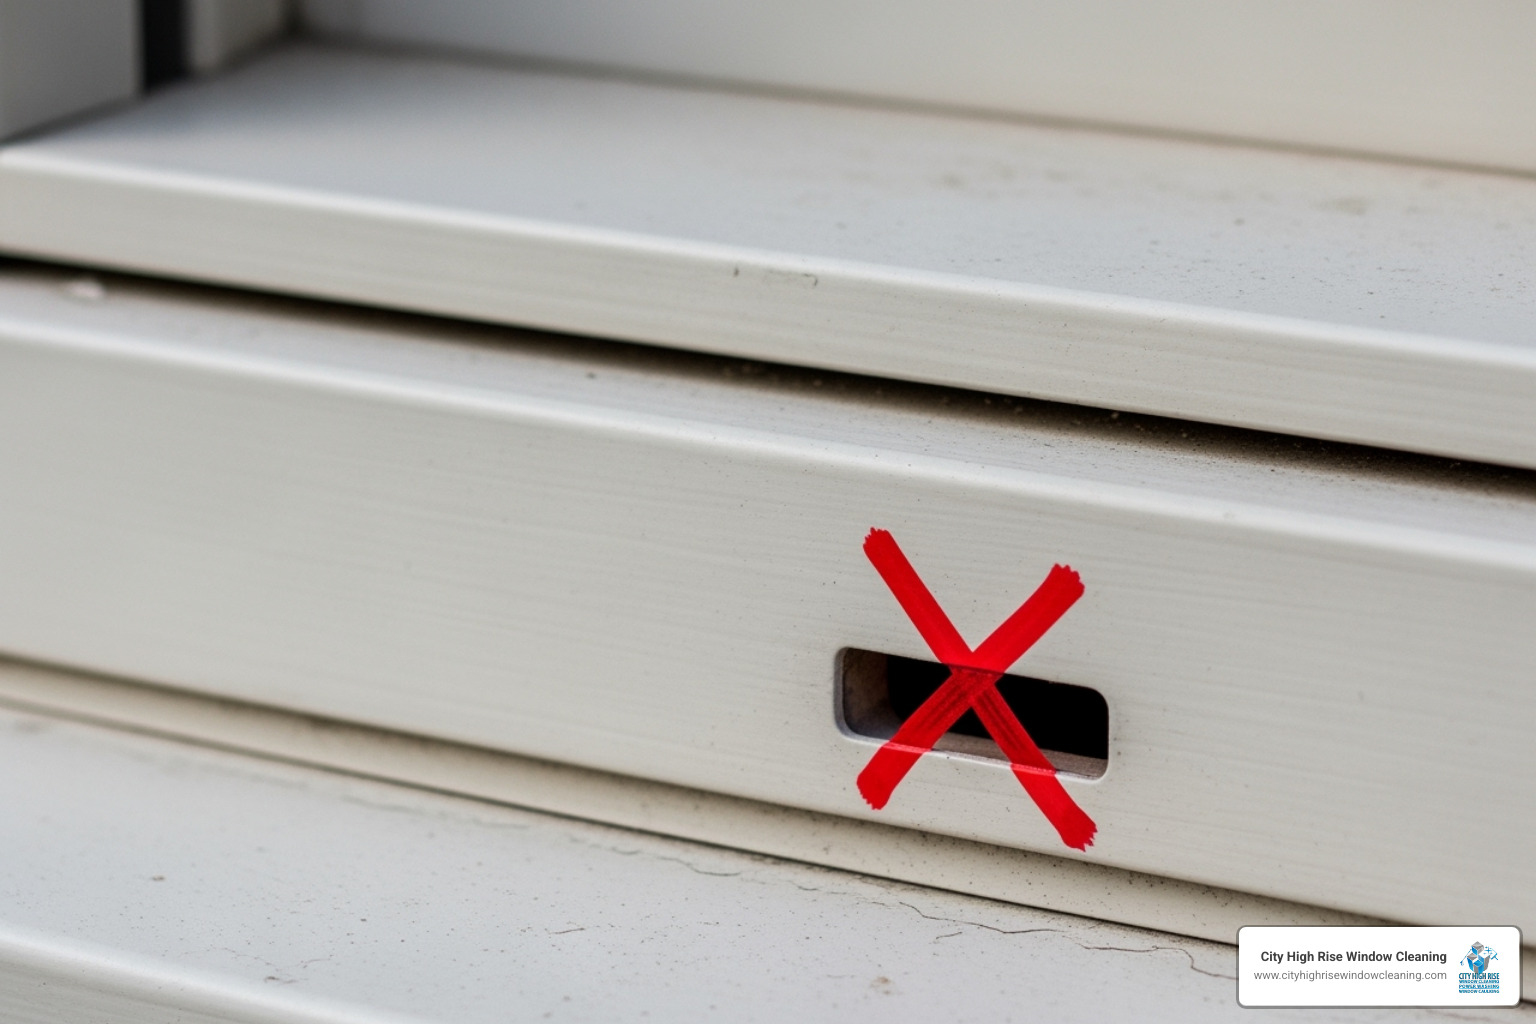
Sealing Weep Holes: These small holes at the bottom of exterior window frames are for drainage. Sealing them traps water, leading to rot and mold. Do not caulk them.
-
Caulking Moving Parts: Do not apply caulk to the window sash, hinges, or any other operational hardware.
- Skipping Surface Prep: Caulk needs a clean, dry surface to adhere. Applying it to a dusty, damp, or greasy surface is a recipe for failure.
- Cutting the Nozzle Too Large: A large opening creates a messy, uncontrollable bead. Start small; you can always make it bigger.
- Not Smoothing the Bead: Tooling the bead isn’t just for looks; it pushes caulk into the joint for a stronger bond and removes excess material.
How long does caulk typically take to dry, and when can it be painted?
Understand the difference between dry time and cure time. Caulk may be dry to the touch in 30-60 minutes, but full curing (reaching maximum strength) can take 24 hours to several days, depending on the product, temperature, and humidity.
For painting, check the caulk tube. Most acrylic latex caulks are paintable within a few hours. Standard silicone caulk cannot be painted unless it’s specifically labeled as “paintable.” Painting too soon can cause cracking and poor adhesion.
How often should window sills be recaulked, and what are the signs that it’s time to do so?
Inspect your window caulk annually. A quality job should last three to five years, but the harsh Northeast weather can shorten this lifespan. Look for these signs that it’s time to recaulk:
- Cracking, peeling, or shrinking in the caulk bead.
- Hardening: If the caulk is no longer flexible and feels like hard plastic.
- Drafts: Feeling cold air around the window is a clear sign of a failed seal.
- Water Stains or Moisture: Any sign of water infiltration requires immediate attention. For widespread issues, professional services like our facade restoration may be needed.
Step 4: Know When to Caulk vs. When to Call a Pro
While caulking a window sill is a great DIY project, caulk is a sealant, not a structural fix. Know when to call a professional.
When is it more appropriate to consider replacing window sills or windows rather than just caulking them?
Caulking is not the solution if you see:
- Rotting Wood: Soft, spongy, or crumbling wood sills need to be replaced, not covered with caulk.
- Major Frame Damage: Large cracks in the window frame itself compromise its integrity.
- Fogged Double-Pane Glass: Condensation between glass panes indicates a failed seal within the window unit, which requires replacement.
- Severe Water Damage: Extensive water stains, bubbling paint, or mold on interior walls point to a more serious leak that caulk alone can’t fix.
- Old, Inefficient Windows: If your windows are single-pane or very old, replacement may be a better long-term investment for energy savings.
DIY limitations and safety on high-rise buildings
For ground-floor windows, DIY is often feasible. However, call a professional for:
- Work at Heights: Working on ladders or upper floors carries significant safety risks. Our team at City High Rise has the experience and safety protocols for high-rise work.
- Complex Access: Some windows require specialized equipment like boom lifts or scaffolding.
- Large-Scale Projects: If you manage a property with dozens of windows, a professional team can complete the job efficiently and correctly.
When in doubt, especially for high-level work in New York, Long Island, or Westchester, consult a professional. As a trusted New Jersey Window Caulking Company, we serve the entire tri-state area.
Step 5: Let it Dry and Enjoy the Savings
After applying and tooling your caulk, the final step is patience. Allow the caulk to fully cure according to the manufacturer’s instructions—typically 24 hours to several days. Rushing this step can ruin your hard work.
Once cured, you can paint (if applicable) and enjoy the benefits. Properly caulking a window sill is a vital maintenance task that seals drafts, prevents water damage, and can significantly lower your energy bills. By closing the gaps where the Department of Energy estimates 25%–30% of heat is lost, you’ve made your home more comfortable and protected it from costly repairs.
This project delivers a triple win: lower energy costs, a more comfortable home, and long-term protection from moisture. That’s the power of a job well done.
Of course, for high-rise buildings or extensive projects, our team at City High Rise Window Cleaning is here to help. We specialize in high rise window caulking and exterior high rise painting services throughout the tri-state area.
Ready for a free quote? City High Rise Window Cleaning offers 24/7 live consultation. Call 917-749-8342 to speak to a live representative.
Frequently Asked Questions about Caulking a Window Sill
How often should you caulk window sills?
You should inspect your window caulk annually. It’s best to recaulk every 3 to 5 years, or sooner if you see visible signs of cracking, peeling, or shrinking. In areas with harsh weather like New York and New Jersey, more frequent checks are recommended.
Can I caulk over old caulk?
No, you should never apply new caulk over old, failing caulk. The new bead will not adhere properly and will fail quickly. Always completely remove the old caulk and clean the surface for a lasting, effective seal.
How long does caulk take to dry before it can be painted?
Drying and curing times vary by caulk type and environmental conditions. Most latex-based caulks are paint-ready in as little as 30 minutes to a few hours. Silicone caulks may need 24 hours or more to fully cure before painting (if they are paintable at all). Always check the manufacturer’s instructions on the tube.
Your Professional Partner for Window Caulking in NYC
While a DIY caulking a window sill project is rewarding, some jobs are too large, complex, or dangerous to tackle alone. For high-rise buildings, commercial properties, or windows with extensive damage, a professional partner is your best choice.
At City High Rise Window Cleaning, we bring over 30 years of experience to projects across New York City, Long Island, New Jersey, and Westchester. Our team has the specialized equipment, safety protocols, and expertise to handle any window maintenance challenge, from simple seals to comprehensive facade restoration. We offer expert window caulking services and exterior high rise painting services with a 100% customer satisfaction guarantee.
Protect your investment and ensure the job is done right. The energy savings and damage prevention start the moment our work is complete.
Ready for a free quote? City High Rise Window Cleaning offers 24/7 live consultation. Call 917-749-8342 to speak to a live representative.


