

Reflect on your life and not your broken side mirror
Reflect on your life and not your broken side mirror
Side View Mirror Glass Replacement: Save $500 and Fix It Yourself in 20 Minutes
Side view mirror glass replacement is one of the simplest DIY car fixes you can do, and it can save you hundreds compared to paying a shop or dealership.
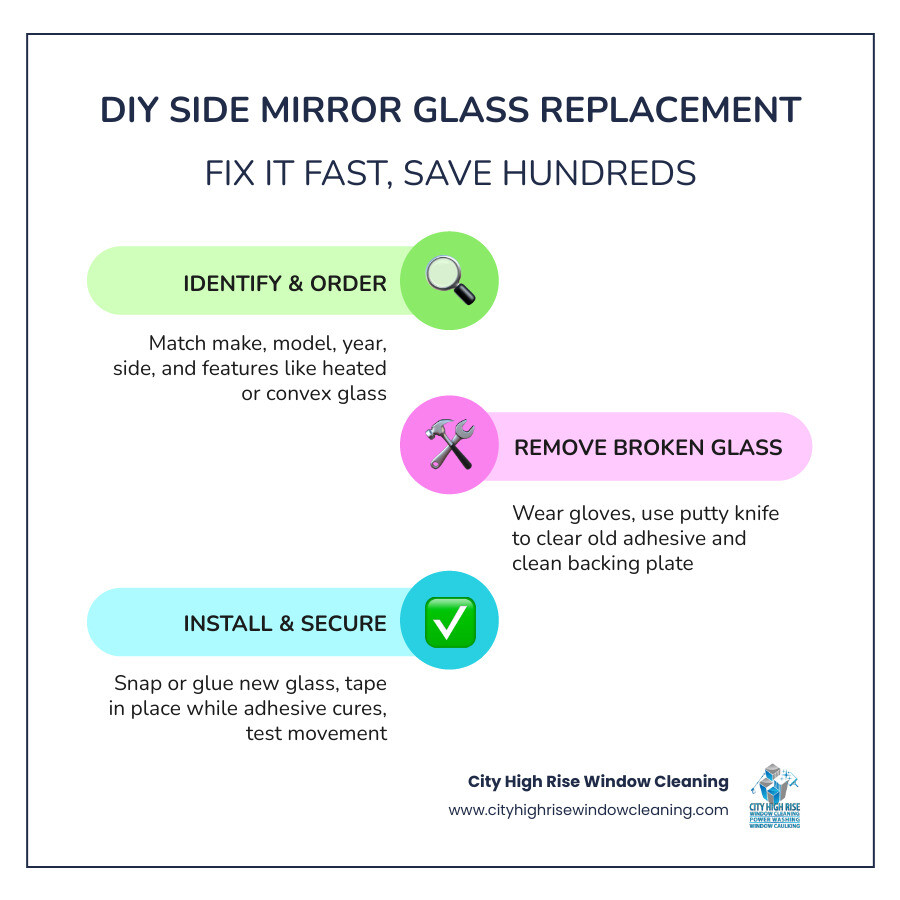
Quick answer – how to replace side view mirror glass:
- Identify your mirror type – snap-on or stick-on
- Order the correct replacement glass – match your make, model, year, side, and features like heat or blind-spot indicator
- Remove the broken glass safely – wear gloves and eye protection
- Clean the backing plate – remove old adhesive and wipe with rubbing alcohol
- Install the new glass – snap it in or glue it in place
- Test mirror movement and visibility before driving
Most DIY repairs take 15 to 30 minutes and cost about $15 to $60 for basic glass, or more for heated and premium options. That is far less than the cost of replacing a full mirror assembly.
A broken side mirror is more than cosmetic. It reduces visibility, makes lane changes less safe, and can lead to tickets in some areas if the mirror no longer works properly.
The good news is that replacing only the glass is often possible. You usually do not need to replace the entire mirror housing.
At City High Rise Window Cleaning, we work with glass every day across New York City, Long Island, New Jersey, and Westchester. While our core services focus on building exteriors, our experience with safe glass handling, surface prep, and restoration is exactly why careful technique matters here too. If you are interested in how proper glass care applies on a larger scale, see our professional window restoration services and commercial high rise window cleaning.
Understanding Your Side View Mirror Glass Replacement Options
Before you go online or run to the nearest auto parts store, you need to understand exactly what you are working with. Side view mirrors are not one-size-fits-all, and how you approach the repair depends heavily on the way your original glass is secured to the housing.
Generally, there are two main categories of replacement mirror glass:
- Stick-on mirrors: These are pre-cut glass sheets designed to adhere directly over your existing broken or cracked mirror glass, or onto the flat plastic backing plate once the old shards are cleared away. They rely on heavy-duty, weather-resistant adhesive or double-sided adhesive patches.
- Snap-on mirrors: These replacements come pre-attached to a plastic backing plate that features clips on the back. This backing plate is designed to snap directly into the motorized pivot wheels inside the mirror housing.
To determine which one your vehicle requires, you must perform a physical damage assessment. Push the mirror housing manually to tilt the glass all the way to one side. Peer behind the glass with a flashlight. Do you see a plastic backing plate that the glass is glued to, held in place by circular plastic clips? If so, you have a snap-on assembly. If your glass is glued flat to a solid, non-removable tray or directly onto a motor plate, a stick-on glass replacement is often the easiest route.
How to Choose the Right Side View Mirror Glass Replacement
Choosing the correct glass is the most critical step of the entire process. If you buy a part that is even a millimeter off, or has the wrong curvature, it simply won’t fit inside your mirror housing.
To get a perfect match, you must know:
- Your vehicle’s exact make, model, and year: (For example, a 2021 Toyota RAV4).
- The specific side: Driver’s side (left) and passenger side (right) are shaped differently and are never interchangeable.
- Convex vs. flat glass: Driver’s side mirrors are almost always flat, providing a true-to-distance reflection. Passenger side mirrors are convex (curved outward) to provide a wider field of view, which is why they carry the famous warning: “Objects in mirror are closer than they appear.”
If you are unsure of the exact specifications, you can consult your owner’s manual or use online vehicle selector tools. For a comprehensive look at how to match these details, check out this guide on How to find the correct glass specs.
Upgrading to Heated, Power, or Auto-Dimming Features
Modern side view mirrors do much more than just reflect light. They are complex electronic hubs. When selecting your side view mirror glass replacement, you must match the exact technological features built into your original mirrors:
- Heated mirrors: These have thin, metallic heating elements attached to the back of the glass. They connect to your vehicle’s electrical system via two small metal terminal pins. When you turn on your rear defroster, electricity flows through these elements to melt away ice and fog.
- Blind spot detection: Many modern mirrors feature a small icon that lights up when a vehicle is in your blind spot. The replacement glass must have the corresponding transparent window and LED connector to maintain this safety feature.
- Auto-dimming technology: These mirrors contain a liquid crystal layer that darkens automatically when sensors detect bright headlights from behind.
- Integrated turn signals: Some glass panels have chevron-shaped LED lights built directly into the mirror surface.
If your vehicle has these features, a simple, plain piece of stick-on glass will block them from working. You must purchase a replacement glass unit that features the built-in wiring harness and electrical connectors designed to plug directly into your vehicle’s existing door wiring.
Step-by-Step Guide to DIY Mirror Glass Installation
Once you have sourced the correct replacement glass, it is time to gather your tools and perform the installation. Preparing your workspace is key to a smooth, safe repair.
Gather Your Tools and Materials:
- Safety glasses (essential when handling cracked glass)
- Heavy-duty leather work gloves
- Putty knife or flathead screwdriver
- Rubbing alcohol (isopropyl alcohol)
- Microfiber cleaning cloth
- Painter’s masking tape
- Glass adhesive or specialized silicone sealant (do not use household hot glue or cheap double-sided tape)
- Hair dryer or heat gun (optional, but highly useful for softening old adhesive)
Preparing the Housing for Side View Mirror Glass Replacement
Safety first: put on your leather gloves and safety glasses. Glass shards can easily splinter and cause serious injury.
If you are dealing with a stick-on mirror, your goal is to create a perfectly clean, flat surface.
- If the original glass is mostly intact but cracked, you can actually glue the new mirror directly over the old one. However, if the old glass is loose, falling out, or highly unstable, it is best to remove it.
- Use a hair dryer or heat gun on a low setting to warm up the mirror face. This softens the old adhesive backing.
- Carefully insert a putty knife or flathead screwdriver behind the broken glass shards and gently pry them away. For more detailed, step-by-step instructions on safely separating the old glass from the motor mount without breaking the plastic housing, see these Step-by-step removal tips.
- Once the old glass is removed, you will be left with the plastic backing plate. Use your putty knife to scrape away any remaining chunks of old adhesive.
- Pour rubbing alcohol onto a clean microfiber cloth and thoroughly wipe down the plastic backing plate. This removes road grime, grease, and adhesive residue, leaving a pristine surface for the new glue to bond with.
Installing Stick-On vs. Snap-On Mirror Glass
Now that the housing is prepped, you are ready to install the new glass. The installation process diverges depending on the replacement type you purchased:
For Stick-On Mirror Glass:
- Test fit first: Before applying any adhesive, place the new mirror glass into the housing to ensure it fits perfectly.
- Apply the adhesive: Most high-quality stick-on mirrors come with double-sided adhesive patches. Apply these patches evenly across the clean plastic backing plate (or onto the back of the new glass). If you are using specialized auto glass silicone adhesive, apply several small beads of silicone, keeping them away from the very edges to prevent squeeze-out.
- Align and press: Carefully align the new glass with the housing. Press it firmly and evenly into place. Hold pressure for 60 seconds to ensure a strong initial bond.
- Secure with tape: Use strips of painter’s masking tape to secure the glass tightly to the mirror housing. Leave the tape in place for at least 24 hours to allow the adhesive to fully cure.
For Snap-On Mirror Glass:
- Connect the wires: If you have heated mirrors, plug the two electrical wire terminals from the door assembly onto the metal pins on the back of the new mirror backing plate. The wires can be plugged onto either pin; there is no positive or negative orientation to worry about.
- Align the clips: Position the new snap-on backing plate over the motorized pivot wheel in the center of the mirror housing.
- Snap into place: Place a clean microfiber cloth over the center of the new mirror glass to distribute the pressure. Using your palm, press firmly directly in the center of the glass until you hear a distinct “snap” or click.
- Verify the fit: Gently wiggle the edges of the mirror to ensure all the plastic clips have locked onto the motor mount.
Cost Comparison: DIY vs. Professional Repair
Many drivers in New York City, Long Island, Westchester, and New Jersey put off this repair because they expect a big bill. In reality, side view mirror glass replacement is usually inexpensive if only the glass is damaged.
Dealerships often replace the full mirror assembly instead of just the glass. That can mean higher OEM part costs, more labor, and extra charges if the housing or painted cap also gets replaced.
| Repair Method | Average Parts Cost | Labor Cost | Total Estimated Cost | Difficulty / Time |
|---|---|---|---|---|
| DIY Glass Replacement | $15 – $60 | $0 | $15 – $60 | Easy / 20 Minutes |
| DIY Heated or Premium Glass | $40 – $150 | $0 | $40 – $150 | Moderate / 30 Minutes |
| Professional Glass Repair (Local Shop) | $30 – $100 | $50 – $150 | $80 – $250 | Easy for user / About 1 Hour |
| Dealership Replacement (Full Assembly) | $200 – $400 | $150 – $300 | $350 – $600+ | High cost / Half-day |
If your damage is limited to the mirror glass, DIY is often the best value. If the housing, motor, blind-spot system, or wiring is damaged, the repair cost rises quickly.
That same cost principle applies to exterior building care too: replacing everything is rarely the most efficient first step when restoration may solve the problem. For related examples, explore our facade restoration and high rise hot water power washing services.
Common Mistakes to Avoid and When to Call a Professional
While side view mirror glass replacement is a highly accessible beginner project, there are a few common pitfalls that can ruin your progress:
- Using household adhesives: Never use standard hot glue, school glue, or cheap double-sided tape. These materials cannot withstand the extreme temperature swings, rain, and highway wind speeds that your vehicle encounters. They will fail, and your new glass will fly off on the highway.
- Applying too much pressure on the edges: When snapping a new mirror plate into place, always apply pressure directly in the center. Pressing hard on the outer edges of the glass can cause the brand-new pane to crack instantly.
- Forcing a mismatched fit: If the mirror glass does not seem to fit, do not force it. Double-check your vehicle specs. Forcing a tight fit can damage the delicate internal motor gears that control your power mirrors.
- Ignoring broken housing elements: If your side mirror was struck by another vehicle or a garage door frame, the plastic housing itself or the internal motor might be broken. If the motor doesn’t whirr when you try to adjust it, or if the main plastic structure is cracked and dangling, replacing just the glass won’t solve your problem. In these cases, you will need a full mirror assembly replacement.

If you find yourself uncomfortable handling broken glass, or if the internal electrical wiring of your luxury vehicle’s blind-spot detection system seems too complex, do not hesitate to contact a local automotive glass specialist in your area.
Frequently Asked Questions about Side Mirror Repair
How long does a typical DIY side view mirror glass replacement take?
Most DIY jobs take about 15 to 30 minutes. If you need to scrape off old adhesive or wait for glue setup, it may take a little longer.
Can I replace just the glass if my mirror is heated?
Yes. You usually can replace only the glass if the backing plate and mirror motor are still intact. Just make sure the new glass matches the heated feature and has the correct terminals.
Where can I buy replacement mirror glass and how much should I expect to pay?
You can buy replacement mirror glass from auto parts stores and online retailers. Basic glass usually costs $15 to $30, while heated or feature-rich glass can range from $40 to $150.
How do I know if I need the whole mirror assembly instead of just the glass?
If the housing is cracked, the mirror will not adjust, the motor no longer works, or the wiring for heated glass or blind-spot monitoring is damaged, you may need the full assembly instead of just the glass.
Can I drive with a cracked side mirror while waiting for replacement?
That depends on local laws and how badly the mirror is damaged, but it is not ideal. A cracked or missing mirror reduces visibility and can make lane changes unsafe.
If you want more tips on maintaining glass and exterior surfaces, browse the City High Rise Window Cleaning blog and learn more about services like residential high rise window cleaning and post construction cleaning.
Conclusion
Side view mirror glass replacement is one of the fastest ways to restore safer visibility without paying dealership-level prices. If the damage is limited to the glass, this is usually a manageable DIY repair that can be done in less than half an hour with basic tools and the right replacement part.
While this article covers automotive mirror glass, the same fundamentals matter in professional exterior care: safe handling, proper cleaning, careful prep, and using the right materials for long-lasting results.
City High Rise Window Cleaning provides high-rise window cleaning, power washing, and exterior building restoration services across New York City, Long Island, New Jersey, and Westchester. With over 30 years of experience, a strong safety focus, and a 100% customer satisfaction guarantee, our team helps property owners protect and restore the glass and exterior surfaces that shape first impressions. Learn more about our professional window restoration services, commercial high rise window cleaning, and high rise window caulking.
Ready for a free quote? City High Rise Window Cleaning offers 24/7 live consultation.


